I have long loved painting my nails.
You could almost call it a hobby.
You could almost call it a hobby.
Once upon a time (before kids) I would paint my nails every night!
I glittered them, striped them, and played with colors.
When I would go to the store, I would always buy a new polish color -
usually bright pinks and reds - oh how i loved reds!
(I always wanted to say I have a signature color!),
changed to nudes/pinks in my thirties,
and now, I think Nail Art my just be my thing!
I have to be honest, for the last year or so I have neglected my hands...
and I thought maybe this Nail Art was not for me...
maybe I was too old to pull it off, too lazy to worry about it....but oh how things change!
I do adore fashion and knowing the trends and staying current on what is hot...
so I figured I had to try it!
I do adore fashion and knowing the trends and staying current on what is hot...
so I figured I had to try it!
I played with a couple Runway Inspired looks.
I created my own runway inspired nail art
(that tutorial is a little bit further down in this post)
(that tutorial is a little bit further down in this post)
and the other I bought right off the shelf from Sally Hansen - the Salon Effects!
When I visited Walgreens earlier in the week,
I saw the amazing collection of Sally Hansen Products,
and was once again bitten by the "Nail Bug".
I have to say I was immediately intrigued by the Salon Effect Real Nail Polish Strips...
I bought the Misbehaved pattern - no questions asked!
The Misbehaved pattern is right on trend with pieces shown
by Gucci, Dior, Versace, Louis Vuitton among others for Spring 2013.
They Real Nail Polish Strips were easy to apply and 5 days into the application, they still looked A-M-A-Z-I-N-G (and I am HARD on my hands - no gloves when I do dishes, I pull nails out with my fingertips - get the picture?).
They Real Nail Polish Strips were easy to apply and 5 days into the application, they still looked A-M-A-Z-I-N-G (and I am HARD on my hands - no gloves when I do dishes, I pull nails out with my fingertips - get the picture?).
Everywhere I go people are complimenting me on my nails!
Seriously, everyone from teenagers to senior citizens.
I spent about $10 on my Salon Effect Polish Strips...
but they last a long time, are super durable and if I couple them with the
Sally Hansen Cuticle Eraser and Balm, I have rockin' nails!
Seriously, everyone from teenagers to senior citizens.
I spent about $10 on my Salon Effect Polish Strips...
but they last a long time, are super durable and if I couple them with the
Sally Hansen Cuticle Eraser and Balm, I have rockin' nails!
After trying the Salon Effects, I was presented with an opportunity to host a "Runway Inspired Girls Night In" for my friends.To prepare for the "event," I dove into my fashion magazines and researched the Spring 2013 runway trends from Fashion Week. I found a pretty comprehensive report at Harper's Bazaar and decided to use their trend report for my inspiration. I made a list of colors to go with my favorite trends and headed to Walgreens to get supplies.
Jules and I headed to Walgreens to select our favorite products and colors so that we could create Runway Inspired Nail Art. My girlie was so into this shop - if it was up to her we would have a Sally Hansen wall in our house!
I selected many colors in the Insta-Dri line. To create Nail Art, it is best for the polish to be completely dry, so I figured this would save on time.I also grabbed a couple of the Complete Salon Manicure colors as well. Then I moved on to the Nail Art Pens and picked up a few or 5! Base and Top coat was a must to keep our nail art looking amazing longer!
Additionally I picked up a cuticle cream and a No Mistakes Correction Pen.
Additionally I picked up a cuticle cream and a No Mistakes Correction Pen.
Girls have to eat and drink, don't they?
While there I also grabbed a few snack items for the Girls Night in Menu -
Wasabi Almonds, pita chips, Skinny Popcorn, and Toffee and Sea Salt Chocolate (giant) Bar. I had some dips and salads already in mind, so these items would pair nicely with my menu and be easy to eat so we could get to painting and creating!
Of course I used my Balance Rewards card so that I could earn extra points (woo-whoo!). You can read all about my shopping trip on Google+
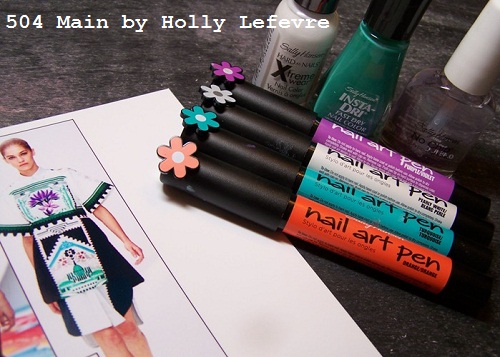
Back at home, I laid out all of the products
(and realized I may have gone crazy in the Sally Hansen display!)
and made preparations for the big night!
I chose to keep the menu simple, as we all like to have dinner with our families...
but I always find it fun to try out at least one new recipes!
I served:
Carrot Hummus and Pita Chips
Lentil Salad
Kale and Avocado Salad
Caprese Skewers
Wasabi Almonds
Sparkling Water
Pink Sparkling Wine
Toffee and Sea Salt Chocolate bars
Then it was time to create!
I decided to inspire my friends with the Runway trends.
I decided to inspire my friends with the Runway trends.
I printed out my favorite trends as exampled and inspiration
for each lady in creating their fashionable nails
This Girls Night In came at a perfect time - it seemed we all needed some girlfriend time! Right now is a crazy time of the year - sports, dances, club activities - all in full swing.
In fact, I had people popping in and out between karate, baseball, and piano lessons.
We are all busy moms and I was pleased to be able
to provide a quick "escape" for my friends
We are all busy moms and I was pleased to be able
to provide a quick "escape" for my friends
We chatted, hung out...and painted our nails!
NOW...Let's Make NAIL ART!
I decided to "play" with the Nail Art pens.
This look is inspired by the "Petal Pusher" trend,
a bold bold mix of florals and geometrics seen on the runways
This look is inspired by the "Petal Pusher" trend,
a bold bold mix of florals and geometrics seen on the runways
of designers like Proenza Schouler, Brood, and Mary Katrantzou.
I happen to love flowers, peasant-like tunics, and geometrics (with a slightly tribal slant)...
so Mary Katranzou's (far right) dress was calling to me!
Here is the tutorial and some tips for creating your own nail art:
TIPS!
- Let the base nail color dry completely...15-30 minutes. It will make a world of difference in how the Nail Art Pens apply to the nails. I rushed it a few times...then decided to be patient and love the results.
- Practice and don't be afraid to start over. If you are out of practice (like me) it may take a bit of time to get used to drawing on your nails! I practiced different designs on my thumbnail first.
- Not feeling coordinated enough to do both hand...invite a friend over! Or get really crazy and have one decorated hand and the other painted in a solid coordinating color!
- Be sure to use a Top Coat s that you get to enjoy your nail art for awhile!
SUPPLIES:
- Sally Hansen Double Duty (top and base coat)
- Sally Hansen Insta-Dri in Mint Sprint (this color is also pretty to close to Emerald - the Color of the Year!)
- Sally Hansen Nail Art Pens: Orange, Purple, White, and Black
- Sally Hansen Xtreme Wear in White On
- I chose to do my thumb in one color and the other fingers in a different color - you can (of course) make them all one color! The design showed up much better on camera on the white nail, but in person looks great on the Mint Sprint as well.
- Apply a base coat - it is a good idea always, but especially when working with darker colors so as to not stain the nail, especially when using darker colors. I used Double Duty.
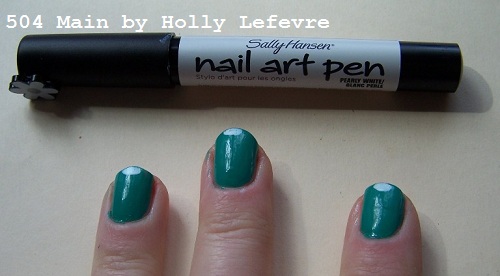
- I painted my thumb in Hard As Nails Xtreme Wear, White On and the other fingers, I used Insta-Dri in Mint Sprint
- Let dry for 30 minutes - just to be safe (see tip #1!)
- Prime your Nail Art Pens. You need to push down on the tip (on paper, etc.) to load the paint into the tip of the pen. If you are a crafter, it is like a paint pen.
- Start with an oval of white at the top center of your nail. Fill in the oval entirely; let dry.
- Make a long petal at the center of the nail using Purple Nail Art Pen. Start near the white oval and draw down toward the bottom of the nail - you can make a straight line and then round it out and fill it in.
- Make 2 shorter petals on each side of the longer one
- Then, make 2 more shorter petals on the outside of the ones you just made. NOTE: you can leave these as straight lines (if you are unsure of your petal making skills)...or make them more petal like.
- In the corner of your nail, use an orange Nail Art Pen, and draw 3 short lines at angles coming out from the corner of the nail. Then using the same color make some dots along the bottom of the nail (optional) - I did this on the thumb, but not on the other fingers..
- Grab a black Nail Art Pen and make small triangles between the purple petals. On the thumb I was able to make triangles. On the other fingers I just made short lines.
- Using the same color as the center of your flower, make small dots by just using the tip of the Nail Art Pen.
- Let dry for about 10 minutes.
- Apply Double Duty for your Top Coat. Let dry!
 |
| I so have a new appreciation for taking photos of hands! |
I am not super talented at small details...so they are not perfect...
(and the photo shows a lot of reflection)
(and the photo shows a lot of reflection)
but I think these are fun and I love the way they look!
________________________________________________________________________
Let's see what everyone else did!
Here are some of the other Runway Inspired Nails!
Here are some of the other Runway Inspired Nails!
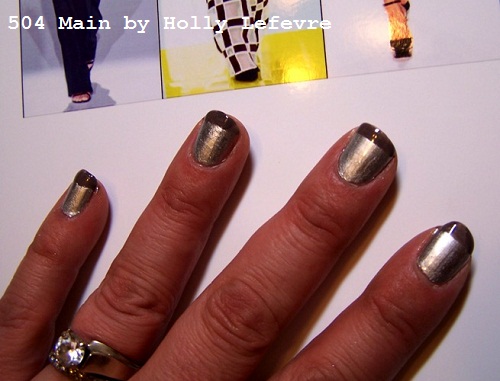
My friend Jenn chose Insta-Dri in Silver Sweep and Color Quick in Smoke for her nails that were Inspired my the Cage Match trend of netting and lace and metallics.
My friend Lisa played with some different ideas, but ultimately selected Back and Blue from the Complete Salon Manicure line, after being inspired by the Far Eastern trend. Isn't this color amazing!
Apparently my Girls Night In Runway Nail Party became a "Girls Night In on the Go!" The next day I helped some 6th grade girls (remember I have a 6th grade boy - so 6th grade girls was a whole new world for me) get ready for a big school dance.
They two opted for subtler looks...but beautiful none the less
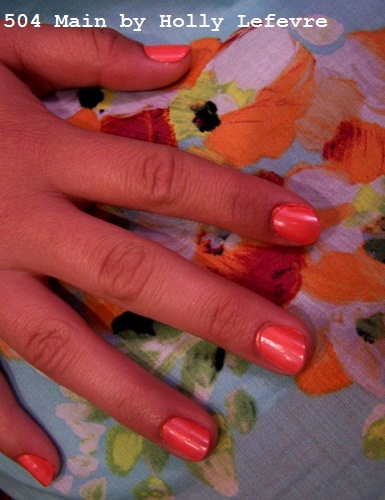 |
| Snappy Sorbet is bold and strong but perfect for Spring and pairs so nicely with florals. |
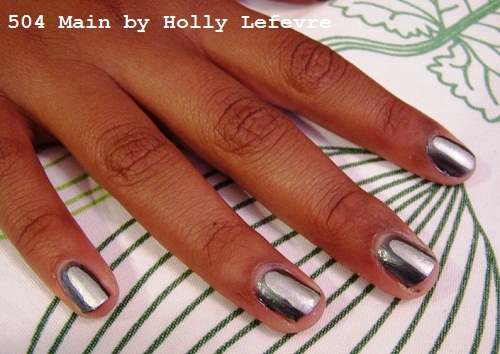 |
| And a littler edgier in striped metallics using Insta-Dri Gone Grey and Silver Sweep. |
Are you ready for a look inspired by the Runways?
How about some ordering the supplies online at Walgreens to create
I Heart Nail Art Animal Instinct or Pattern Is The New Black?
See how easy it is to create nail art when you can order online
I Heart Nail Art Animal Instinct or Pattern Is The New Black?
See how easy it is to create nail art when you can order online
And, check this deal out!
Walgreens has a BOGO 50% on Insta Dri and Salon Effects that
runs until 3/30/13.
Starting on Sunday the 17th, shoppers can get a
coupon on the Walgreens app for Salon Effects!
(You know where I will be!)
NEVER COULD I HAVE IMAGINED that I would still be having fun playing with my nails...thanks to Sally Hansen. Sally Hansen has always be my "go to" nail resource. I need nail care, I look to Sally Hansen. It has always been synonymous for nail color and care...and now they are the leaders in the Nail Art trend - my new favorite thing!
So, what do you think...you ready to try some Runway Inspired Nail Art?
and enter your Nail Art on Facebook!
You will be inspired!
And don't miss out - follow Walgreens on twitter for great savings!
And of course be sure to use your Balance Rewards card!
You will be inspired!
And don't miss out - follow Walgreens on twitter for great savings!
And of course be sure to use your Balance Rewards card!







.JPG)
Wow, love how your nails turned out! I also used Harpers Bazaar for my design inspirations, they had the best runway report!
ReplyDeleteHolly, your nails look fabulous and you have made it look so easy! Dare I try it? I seem to try to detract from my hands in recent years. It is a shame I had to get this age to realize I should have used more sun screen on my hands--so now I have the brown "age" spots to show for it. Still, I love all the new colors, especially the metallics and the paint pens look like so much fun. Thanks for showing us how to do it!
ReplyDeleteThey all turned out so beautiful, Holly!
ReplyDeleteThat chrome look is pretty cool! I think I'm too old for that stuff but you gals make it look fun!
ReplyDeleteRachel LOVES those nail pens and the instant polish! Thanks for the coupon mention!!!
ReplyDeleteLove your tutorial, I'm horrible at art but this one looks simple! At least for me to create one accent nail :)
ReplyDelete