I always joke that I married my husband because I would not have to change my initials.
I very much liked that big ole "L" that was the beginning of my last name.
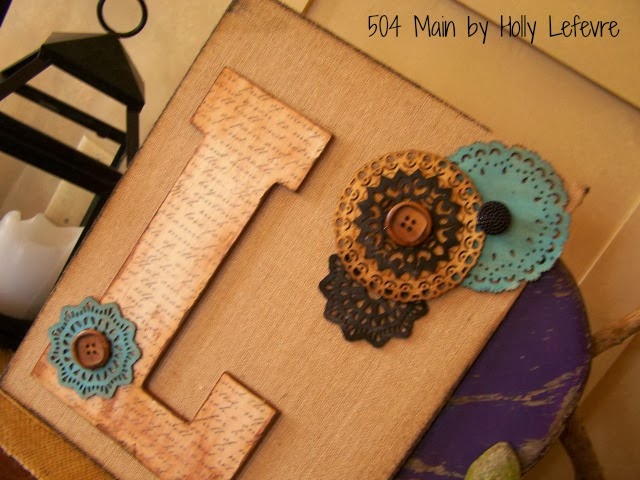
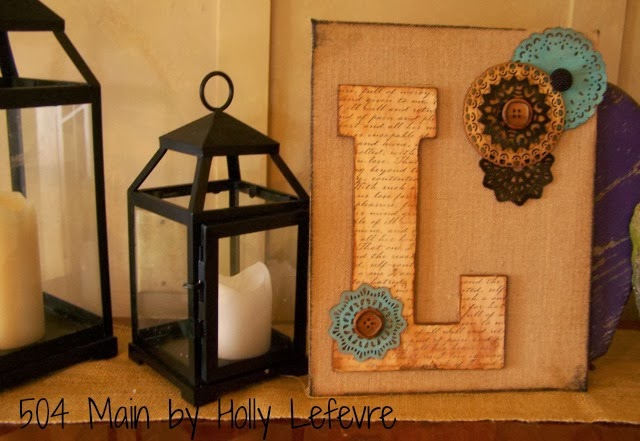
I have always (long before the monogram trend began) loved using my initials to personalize my decor. That is why I love this Monogrammed Burlap Canvas project that is part of the Michaels and Hometalk Pinterest Party.
Visit Hometalk and search the hashtag #MPinterestParty to see a ton of great projects!
Visit Hometalk and search the hashtag #MPinterestParty to see a ton of great projects!
So, are you one of those who browse Pinterest...a lot...too much, but have not quite gotten around to finishing (or starting) one of those fabulous projects? Well now it the time! How about you swing on over to Michaels this Sunday, February 16 to join some Fabulous Hometalk Bloggers all over the U.S. and even parts of Canada to craft some Pinterest Inspired projects!
How do you join in?
When
you visit Michaels be sure to look for the endcap displays showcasing
Pinterest Projects that you can do NOW! Chalkboard crafts, gorgeous
glass bottles, burlap, birdcages, sweet muslin bags - there is a craft
for everyone.
Be sure to visit Michaels to see which blogger will be in your area...
and guess what...I will be at Michaels in Marina, CA from 1-4pm on February 16.
So what do you need to do to join in the crafty creativity...it's simple!
* Join me (or another fab blogger/crafter in your area) for the Hometalk and Michaels Pinterest Party!
* Feb 16th, 1pm – 4pm at your local Michaels store
*
Check out the Pinterest inspired displays at your local Michaels store,
buy your supplies, and meet us in the classroom to create your own
pin-worthy project.
To start with I am going to show you my take on a very popular Pinterest projects a wooden monogrammed burlap canvas. You can make this canvas simple or elaborate and there are so many variations. In fact, tomorrow, I will show another version, but today, lets start with a stylish, trendy and totally doable project for anyone!
Supplies
(I have included some pricing. Prices are subject to change and be sure to bring your COUPONS - there are links at the end of the post!)
- 1 Burlap Canvas (Artist's Loft). I purchased a 3-pack of 11" x 14" canvases. ($10.99/3 pack)
- 1 Wood Letter (L) ($3.99)
- 1 12 x 12 piece scrapbook paper (.20 each+)
- Decoupage medium
- Foam brush
- 2 "Large" laser cut wood doilies ($1.19 each)
- 3 "small" laser cut wood doilies (.49 to .99 each)
- Paint/Color (2 options):
- 1 Tim Holtz Distress Paint, Broken China ($4.99 each)
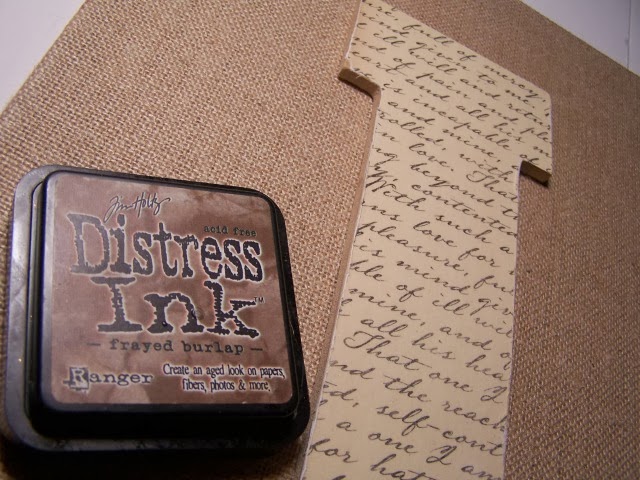
- Tim Holtz Distress Ink, Frayed Burlap and Black ($4.99 each)
- OR
- DecoArt Americana paint in desired colors (Raw Umber and/or ebony) and paint brush ($2.00)
- Sandpaper
- Scissors
- Glue, Weldbond ($2.99)
- Buttons or other decorative accessories (varies)

Make It!
- Use the Distress Ink around the edges of the canvas; simply rub the sides and corners. Begin with the Frayed Burlap, and finish, lightly, with the Black. It is easier to do this now, before you glue on the doilies)
- Trace the letter onto the scrapbook paper and carefully cut out the paper.
- Apply a layer of decoupage onto the wood letter.
- Place the cut out paper onto the wood letter and smoother to release air bubbles.
- Apply a layer of decoupage over the top of the paper; smooth; let dry.
- Use the Frayed Burlap Distress Ink and rub the edges of the letter. Or, if using paint do the same, being sure to get the corners very well, and perhaps even the entire letter, depending on your level on desired "distress." To distress the entire letter, brush paint all over and then wipe with a damp paper towel; reapply as desired.
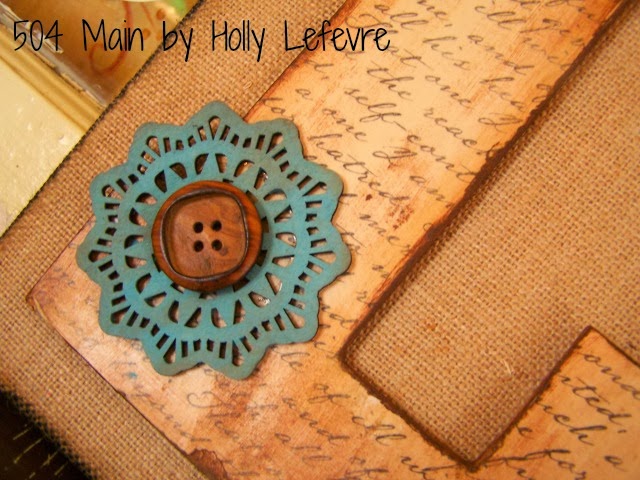
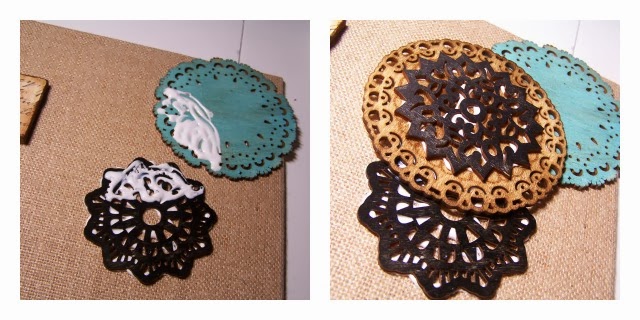
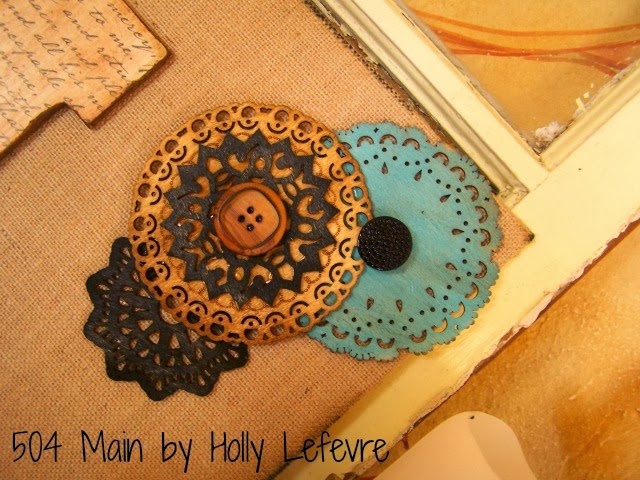
- Color/paint on one large and one small doilie in blue (or desired color); paint/color on black. Color 2 small doilies in black. Let dry. The Distress Paint is super easy - it has a sponge applicator and you can prep it and rub all over with very little mess and a short drying time.
- Rub Frayed Burlap on blue doilie after it is completely dry.Just press stamp pad down and rub.
- Place wood monogram on burlap canvas. I placed mine up about 1" and over about 1" from the left, but depending on which letter you are using, you may need to adjust your placement.
- Place the doilies in the top right corner (again, depending on your letter placement you may need to adjust the placement of the doilie).
- Once happy with the positions, Use the Weldbond to glue into place. Let dry.
- Finish up by adding any other embellishments (buttons, flowers, ribbon, etc.)
If you are not familiar with Hometalk...you MUST head over to check them out! Hometalk
is a home and garden network loaded with amazing ideas for your home -
from major remodels to DIY's, to crafts to household tips!
Follow Michael's on Hometalk to enter to win a $100 Michaels gift card.
Five winners will be announced on Hometalk's Facebook Page
page on Feb 17, after the party.
Five winners will be announced on Hometalk's Facebook Page
page on Feb 17, after the party.
Check out all the creativity and inspiration!
Follow Michaels on Instagram
Follow Hometalk on Instagram
TEXT "INSPIRE" TO 646-736-2200
for your chance at winning a $100 giftcard!
Follow Michaels on Instagram
Follow Hometalk on Instagram
TEXT "INSPIRE" TO 646-736-2200
for your chance at winning a $100 giftcard!
Be sure to take advantage of Michaels coupons (U.S.Coupons or Canadian coupons) and
sales for your projects.
And to add to the fun...the first 24 attendees with receive these sweet chalkboard cards!
Hope to see you at a Michaels on Sunday!





I LOVE your project Holly! :) I have posted it on my event page (on facebook) great job!
ReplyDeleteHolly...by gosh by golly I love this!
ReplyDeleteOh I love this Holly, really pretty and creative! I joke about the same thing that I married my husband to not have to change my initial on my last name. :)
ReplyDeleteSo creative! Enjoyed getting to know you + your blog from the Pinterest Party!
ReplyDelete