The other day I walked you through how to prep your concrete floors for staining or dyeing. Today (ta-da!) I am going to show you how I applied the dye and the wet look sealer. I will admit...quite a few times during this process I thought I was crazy! But, now that I am done...I LOVE these floors.They have depth, texture, warmth...and are durable!
At first, I debated between painting the floors or staining and I am so glad I chose this path. For me, it works with my house. My craft room is right off the kitchen area, and I did not want the room to look like it was from another planet, but a well-thought out part of the house...and for this house, this is what worked.
The preparation took me about 12 hours + of work. The actual application of color (NOT including drying time) took maximum 30 minutes per coat (probably less!). Applying the dye was so quick with the sprayer. I have seen tutorials that use paint brushes and rollers as well, but after completing this project, I have to say a sprayer is the way to go! I assume different application methods will give you a slightly different finished look. Be sure to read HOW TO STAIN OR DYE CONCRETE FLOORS: PART ONE, THE PREPARATION. There
are very important steps to take before you begin adding color. There is a complete list of
supplies on that post as well. This post is very detailed...because quite frankly that is what I look for when I want to tackle a project as big as this...that I have ZERO experience with.
Supplies
I started with a kit, purchased at the Home Depot by Behr which even though I had to purchase extra product was still a good deal (see supply notes). (some of this is duplicated from yesterdays Preparation post)
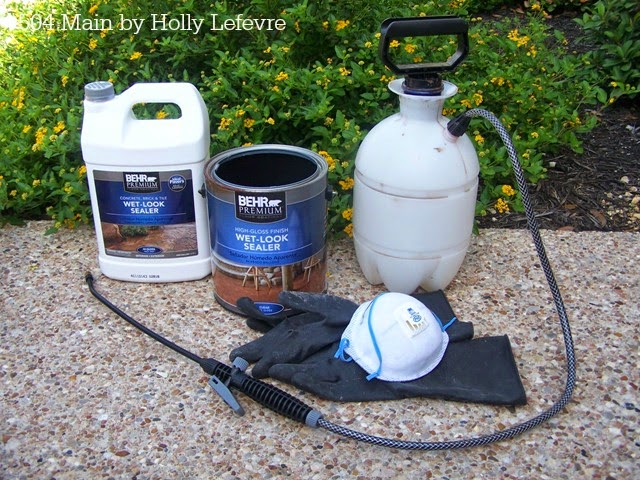
The kit was about $90. It came with:
- A pump sprayer
- One quart of etcher/cleaner
- One Gallon of Base Color (Sand)
- Accent color (about 1/2 gallon) (Walnut)
- One Gallon of Wet Look Sealer
- One Gallon of Cleaner/Etcher (which I used about half of)
- One additional quart of tintable base color (I would have bought a gallon but they were out).
- Claw Hammer (used for removing carpet tacks)
- My new favorite thing: Stanley Wonder Bar (used for removing carpet tacks)
- Wet Concrete Patch and Putty knife
- Acid proof/tolerant gloves
- Husky Bent Handle Paint Scraper (do not use metal with the cleaner/etcher)
- Face mask
- Eye Protection
- Blue Tape (I used Scotch Blue)
- Plastic or Painters Paper to protect the walls and baseboards
- Broom and dust pan
- Vacuum (I recommend a Wet/Dry Vac - you will see how I used it below)
- Rags or old towels are a good idea too!
NOTE: THROUGH OUT THIS PROCESS IT IS IMPORTANT TO PROTECT YOURSELF WITH THE PROPER GEAR, WHICH INCLUDES BUT IS NOT LIMITED TO: GLOVES, EYE PROTECTION, FACE MASK, PROPER FOOTWEAR. Make sure the room has good ventilation too. It was hot when I did this, but I turned off the AC and opened all the windows.
Now that my floors were prepped and CLEAN, it was time to add some color. My kit came with a base color and an accent color. I did not plan on using the accent color. I put down my base, Sand, and liked the color. It was gorgeous and light, but I needed more. I went to the Home Depot to buy more...and alas they were out.
When I got home, I re-valuated my situation. Around the perimeter of the room, there were darker marks from where I filled the concrete...so I decided maybe I did want more depth and I added some accent in Walnut.
STEP 1
I already protected my baseboards and lower part of the walls (although the baseboards did not all survive unscathed), but for the color, which I was using a pump sprayer for, I thought I might need more protection. I taped plastic all around the room.
STEP 2
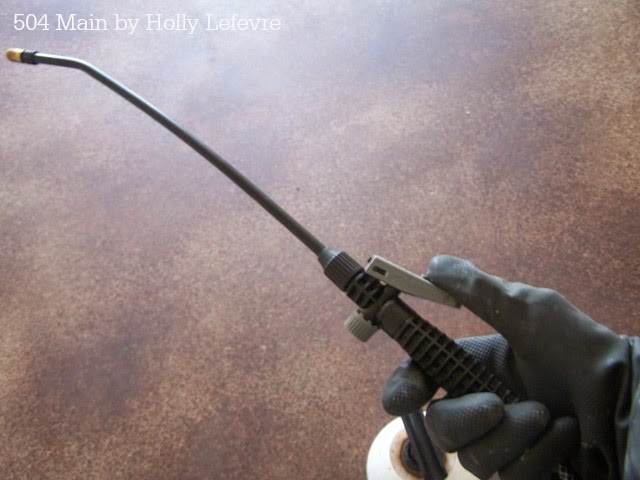
Assemble your sprayer and then test your sprayer. The instructions in the kit, as well as the DVD give great direction for using the sprayer. I put water in mine and tested the different nozzle settings to see which one I liked. I just tested the water on the driveway outside.
STEP 3
Stir the base color well. Pour the base color in the sprayer. Tightly put the cap/pump on.
Pump the sprayer to pressurize it (otherwise...no spray! Maybe just dribble). As you pump, you can feel the pressure building. You WILL have to PRESSURIZE THE TANK periodically as you dye the floor. Once the spray begin to seem less fine and misty and you can "see" drops, you need to pressurize again. You may have to do this several times.
STEP 4
I began in the far corner and worked my way out of the room, just as I did when I was cleaning. I started a little out from the corner, working my nozzle in a twirling pattern (because that gave me the random coverage that I wanted). As I got used to it, I moved closer to the baseboard to fill in. I worked my way out and back in to the baseboards all around the room, until i was eventually able to get behind the doors, and then stand in the door way to finish up.
NOTE: Do not spray in a pattern. You will "see" the pattern. For example, if you spray figure 8's, you may see figure 8's in the final result. If you spray stripes, same thing. I found the nozzle/hose to be very flexible and I did larger, loose circular motion, mostly by letting the hose "be free."
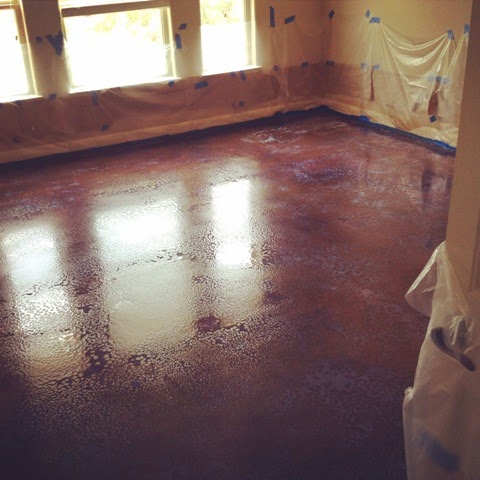
The color looks dark when wet....
This is the color dry...
STEP 5
NOTE: When you unscrew the lid from the sprayer, it depressurizes. If there is color or water, you can spray yourself and the walls (everything). Place a thick towel or rag over the opening to cover it as you unlock/unscrew the top. You will hear the air releasing (like a soda bottle)
STEP 6
The next day (24 hours later), I cleaned the sprayer, using water and a bucket (empty remaining color if any back into the can, place water in the sprayer and spray into a bucket until the water comes clean.). I sprayed the accent color. I used the sprayer (see STEP 4) but was more random with the accent. I did not want to cover all of the base. I "hit" the corners and just sort of eyed it.
STEP 7
I waited until it was dry enough to walk on, and still wanted "more." I went back to Home Depot and they had received a shipment. I purchased one quart of tintable dye in my base color, Sand.
Repeat Step 6 if necessary, and fill the sprayer with the base coat. After 24 hours (since the accent color), I sprayed the base coat allover the floor again, being sure to cover any areas I thought were too light. This gave me the results I wanted.
STEP 8
Let the floor dry completely. The instruction say 24 hours, but I waited longer...mainly because of time and life.
STEP 9
Clean your sprayer thoroughly...see STEP 6, before you add the Wet Look Sealer (you do not have to use Wet Look, there are other options).
Add the Wet Look Sealer to your Sprayer, pressurize it. I began in the same corner as before and sprayed, making sure to cover all of the floor.
Once I put the first coat down, I could see that I had missed places (the way my light shines in the window allowed me to see this) or that some places were not even. I decided to purchase another gallon and do a second coat, after waiting 24 hours.
After 72 hours you can move furniture back into the room (which I am working on). Wait 30 days to do any serious cleaning.
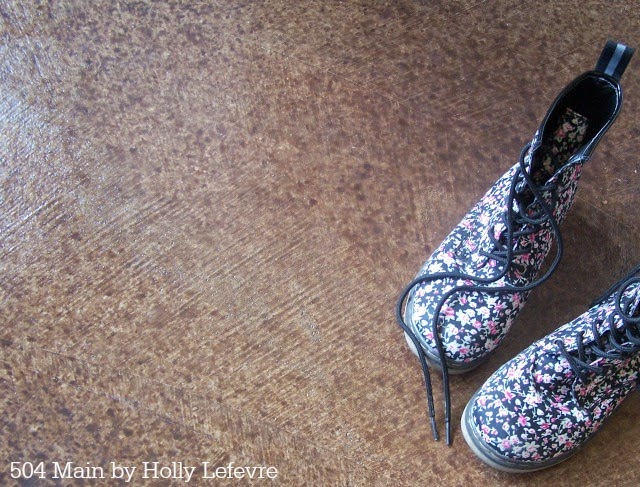
And the results!
A close up (it is really hard to take a good photo of the floor!)
NOTES:
- If I would have used only the base color, my floors would be lighter. You do not need to use 2 colors. I actually liked the lighter but I was impatient. Take your time.
- The darker accent color helped hide some of the patching I had done and some of the stains I could not get off the cement.
So, do you think you could or would do this?
If I can, you can. I do a lot of DIY, but not serious (building cabinets or. additions, etc.) DIY. I added a lot of detail because I think it is important if you are intimidated by a project like this. I learned a lot, and really wish I could get rid of the carpet in the bedrooms now!


Thank you ever so much for the tutorial. How much total did it end up costing you? I am pretty sure the awful asbestos glue on my concrete slab based house, so I have to DIMyself. I am a bit afraid though..... I just might have to continue with the paper bag floors.......... so I do not have to further disturb that asbestos. The acid etching is frightening me. Ya know?
ReplyDeleteHi Sheryll - I cannot find an email address for you anywhere...so I sure hope you see this! I would say in the end, my floor cost me about about $250 (plus), maybe just a tinge more. $90 for the kit, $25 for more etcher, $20 for more stain, $30 for more sealer. I bought $4 gloves, already had a face mask, $10 wonderbar, already had a hammer, and I already had a thick broom, but they are about $10. I did buy a new wet/dry vac which was $30 (hope my math adds up there!)
DeleteI had no glue on my floors, and if you think there is asbestos in your glue, I would have it tested or bring in a professional before I would mess with removing it - that is just something not to fool around with for sure!
If their is no asbestos, the etcher/cleaner is safe but the asbestos throws a wrench into the plans for sure. Be sure t have it checked out!
If not paper bag floors are so cool!
They look amazing. I need to find a spot to do this in our house.
ReplyDeleteHolly, you did a fabulous job on the floor! It looks awesome. Like so many projects, most of the time and work is in the preparation as it was with your floor. It was obviously worth it because the floor is gorgeous. Thanks for sharing the process with your readers.
ReplyDeleteHolly thanks for the tutorial , so glad I found your project on staining. I have been wanting to do this to my garage for quite some time now after seeing your amazing looking floor I think I can do this. Great job!
ReplyDeleteHolly we just purchased this kit and wondered how it is holding up?
ReplyDeleteHi Garrick...I cannot seem to find an email for you so I will reply here. The kit is holding up well. I do have a few spots where the stain has peeled off (even thought I cleaned 2-3x. I assume this is from some construction residue leftover that I missed). The only other thing I would add is to go easy on the second color to make sure you like it. While I like the floors, I think I would have preferred to have variations in just one color.
DeleteGreat tutorial. I'm thinking of putting in a stained concrete patio outside. How do you feel this would hold up to weathering (and lots and lots of rain)? I know your project is inside but in your research did you come across some nice outdoor examples? Your floor is helping me lean more and more toward this sort of application over stamped concrete, pavers, or a wood deck. :-)
ReplyDeleteHi Holly!! Your floors look great! My husband & I are literally gearing up to dye our concrete floors in 3 bedrooms, including closets, hallway & parlor room. We woke up yesterday to a flooded house & bc of there being so much water (so much it was coming OUTSIDE of the house) we decided to go ahead & remove the carpet & go forward with staining/dying the bare floors. We initially looked at acid staining,however, neither of us are skilled in this area & the fear of using an acid solution brought us to using the Behr Non Acid Dye. We've purchased our base color, accent color, Cleaner & echer, and of couse the awesome hi-gloss sealer. My questions to you are how happy are you with your floor now? How badly has the area chipped (if at all)? Do you have holes in the dye? I'm curious bc I am seeing mixed reviews.
ReplyDeleteHi Jessica...I cannot seem to find an email for you so I will reply here. The kit is holding OK. I do have a few spots where the stain has peeled off (even thought I cleaned 2-3x. I assume this is from some construction residue leftover that I missed). The only other thing I would add is to go easy on the second color to make sure you like it. While I like the floors, I think I would have preferred to have variations in just one color.
DeleteGreat job! Thanks for the tutorial. Did you have any issues with the dye on the patches you did for the carpet tacks? I'm debating on stain v dye and I think the dye would be more forgiving. Thoughts?
ReplyDeleteHi there. I tried to email you back but the email wasa no-reply@blogger. I'm going to post here and hope you see my answer. I did not have issues with areas where the carpet tacks were. But I have experienced areas that have randomly chipped off.
Delete