Monday, October 16, 2017
Wednesday, March 1, 2017
disclsoure: This is a sponsored conversation written by me on behalf of De'Longhi Group
Getting married is amazing. It is exciting. It is a time like no other in your life. As a former wedding planner and wedding book author, I know it can also seem overwhelming. Selecting flowers, dresses, invitations, and parties are what most couples consider wedding planning, but there is so much more. One aspect of planning most couples tend to underestimate is developing the bridal registry. They think it is easy to select a few amazing gifts and be on their way, but truth be told, crafting a useful and meaningful wedding registry is almost an art form!
Getting married is amazing. It is exciting. It is a time like no other in your life. As a former wedding planner and wedding book author, I know it can also seem overwhelming. Selecting flowers, dresses, invitations, and parties are what most couples consider wedding planning, but there is so much more. One aspect of planning most couples tend to underestimate is developing the bridal registry. They think it is easy to select a few amazing gifts and be on their way, but truth be told, crafting a useful and meaningful wedding registry is almost an art form!
Monday, February 27, 2017
Slime is taking over! Have you noticed? White glue is hard to find...kitchen counters have a strange goo on them and your kiddo is probably asking for borax! My daughter has had a slime obsession for about 2 years now...but it seems the fun of slime has caught on! There is regular slime (sometimes called goo), sparkling slime, clear slime and our personal favorite...Fluffy Slime!
The ingredients are simple (although that glue may be hard to find!) and the recipe is pretty easy.
I do have a FEW TIPS if you and your kiddos are ready to join the slime revolution.
1 - Cover your work surface. We use wax paper or parchment paper
2 - I purchased a couple bowls for $1. These are the slime bowls - meaning do NOT use my good bowls.
3 - I also purchased a set of measuring cups and spoons for this purpose. I found cheap ones - and felt better just letting her use these. If you are only making this once, just be sure to wash your items thoroughly.
4 - My daughter can make this on her own now....HOWEVER, each child is different. Be sure to supervise your child and make this a fun and safe activity.
5 - Do not put the extra slime (the stuff in the bowl) down the sink drain. wipe it out and toss it is in the trash.
6 - My daughter must clean up completely by herself or ask for help.
Fluffy Slime Recipe
Supplies
4 ounces white glue
3-4 cups shaving cream. You can measure I just eyeballed it.
2 Tablespoons contact lens solution
1 Tablespoons borax
1 cup hot water
2-3 drops of acrylic paint or food coloring. (I actually used more than 3 drops in this batch)
Also needed:
measuring spoon
measuring cup (liquid)
2 bowls
protection for work area
spoon, craft stick, etc. for stirring
Make It!
Now you have amazing magical FLUFFY SLIME!
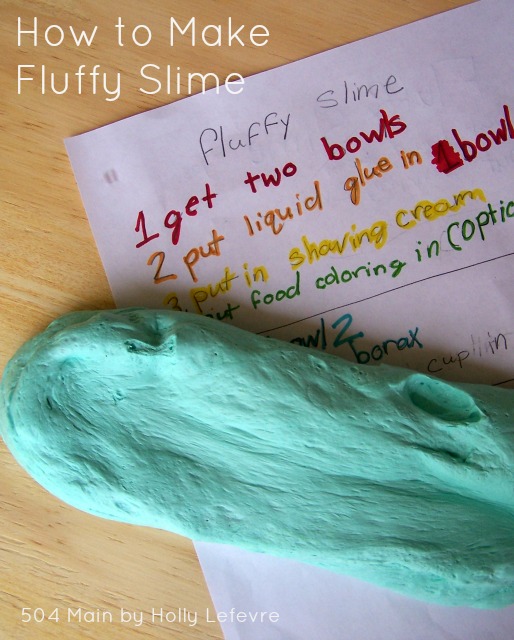
I love how my daughter wrote out here recipe - but no measurements - she is a slime master!
Need more slime in your life...here is our recipe for good old regular slime

This post is written and created at 504 Main by Holly Lefevre
These blog posts - tutorials and recipes and advice - are meant for inspiration. You must always keep your own skill level in mind when attempting a project. You should take proper safety precautions and wear proper safety equipment. Undertaking a project with my tutorials, suggested products or tools is at your own risk.
The ingredients are simple (although that glue may be hard to find!) and the recipe is pretty easy.
I do have a FEW TIPS if you and your kiddos are ready to join the slime revolution.
1 - Cover your work surface. We use wax paper or parchment paper
2 - I purchased a couple bowls for $1. These are the slime bowls - meaning do NOT use my good bowls.
3 - I also purchased a set of measuring cups and spoons for this purpose. I found cheap ones - and felt better just letting her use these. If you are only making this once, just be sure to wash your items thoroughly.
4 - My daughter can make this on her own now....HOWEVER, each child is different. Be sure to supervise your child and make this a fun and safe activity.
5 - Do not put the extra slime (the stuff in the bowl) down the sink drain. wipe it out and toss it is in the trash.
6 - My daughter must clean up completely by herself or ask for help.
Fluffy Slime Recipe
Supplies
4 ounces white glue
3-4 cups shaving cream. You can measure I just eyeballed it.
2 Tablespoons contact lens solution
1 Tablespoons borax
1 cup hot water
2-3 drops of acrylic paint or food coloring. (I actually used more than 3 drops in this batch)
Also needed:
measuring spoon
measuring cup (liquid)
2 bowls
protection for work area
spoon, craft stick, etc. for stirring
Make It!
- Pour 4 ounces of white glue in a bowl.
- Add 3 drops of paint or food coloring and mix.
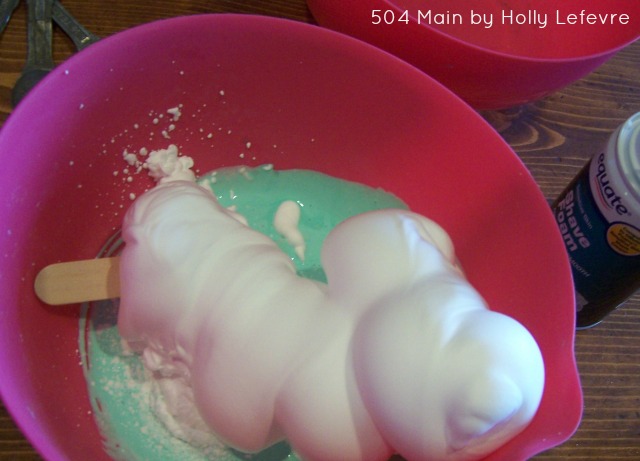
- Add shaving cream.
- Mix completely.
- You cannot play with it yet...it still has the consistency of shaving cream.
- Add 2 Tablespoons of contact solution and mix. You will start to see it sticking together and changing consistency.
- Mix 1 Tablespoon of borax with your hot water. Now add 2-3 tablespoons of this mixture to your shaving cream/glue mixture. Mix well.
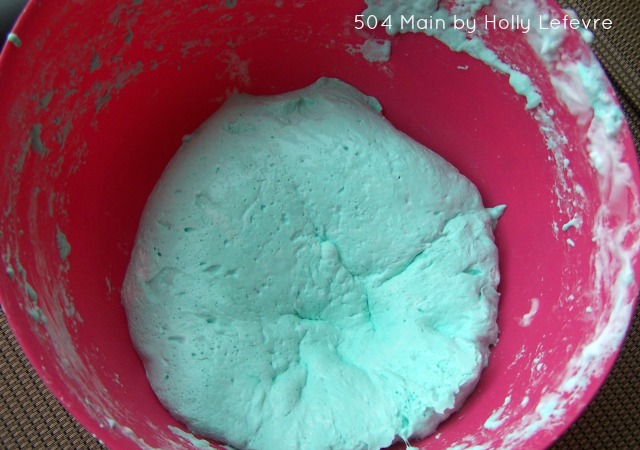
- You will see the slime begin to pull away from the bowl. Keep mixing...eventually it will form a ball in the bowl. Mix for about 30 seconds.
Now you have amazing magical FLUFFY SLIME!
I love how my daughter wrote out here recipe - but no measurements - she is a slime master!
Need more slime in your life...here is our recipe for good old regular slime
Labels:
#slime,
craft,
elmers glue,
Goo,
kid craft,
kid fun,
projects,
slime,
white glue
Sunday, February 12, 2017
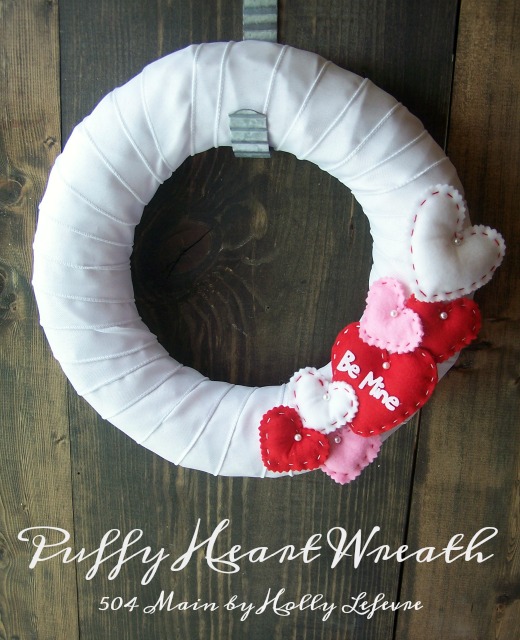
Who doesn't love puffy hearts? I made these puffy heart necklaces a few years ago and never blogged about them. Then I was at the craft store and I saw a cute little box of puffy hearts. First I made a puffy heart wreath and now I made another puffy heart necklace for my daughter - because puffy hearts are always a good thing and you have hearts left over after you make the wreath!
Friday, February 10, 2017
When it comes to me and holidays...any holiday, my motto is "It ain't over til its over." And while I realize Valentines Day is right around the corner, I just couldn't resist making this adorable Valentines Day Wreath. I puffy heart love this puffy heart wreath so much! And guess what....? It took my less than 15 minutes to make...and if you make it my way, all of the supplies are reusable.
Thursday, January 12, 2017
When I was younger and we would go to dinner I would always ask my mom if I could get "mashed potatoes, hash browns and french fries," - and only that...YUM! (By the way, she always said no.) But I am an adult now. I could order that if I wanted too...but alas I try to stick to one kind of potato per meal. Now, however, I have learned how to cook my potatoes in different ways and to create healthier versions of my favorites...hence these delicious Oven baked (No Oil) Potato Wedges. And guess what...everyone in the family gives them a thumbs up!
Tuesday, January 10, 2017
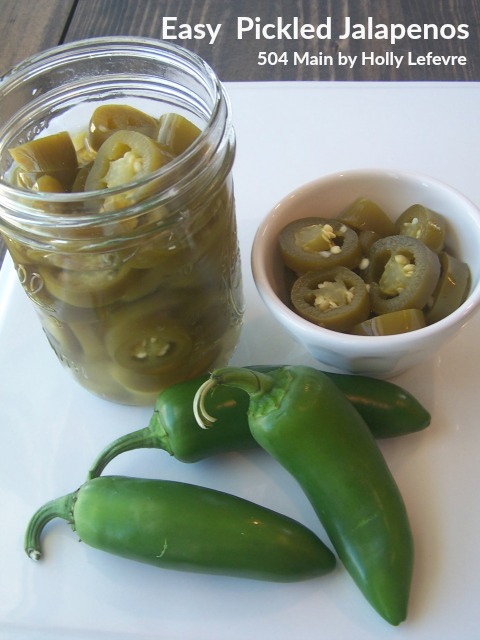
I have a big sweet tooth, but my real weakness is salty pickled anything. I love pickles, pickled eggs, pickled cauliflower, pickled carrots - you name it. Now I am making my own pickled jalapenos - because why not pickle everything. Well, really because I love them as they are, in salads, on tacos - they are simply delicious!
Sunday, December 18, 2016
I really needed some thing to add some sparkle - glitz and flair to our Christmas decor, but obviously there's not a lot of time left before the big day. BUT there is time for a 15 minute wreath!I decide to make this delightfully obnoxious, sparkly wreath. I bought a ton of tinsel garland at a thrift shop and was not quite sure what to do with it and suddenly it hit me - it need to be a wreath and have a big ole plaid bow...because I love mixing things that do not normally go together...and ya know what...I more than LOVE it...and I may use this as next years Christmas theme.
Thursday, December 8, 2016
This shop has been compensated by Collective Bias, Inc. and its advertiser. All opinions are mine alone. #FlavorSplash #CollectiveBias
I have never, ever made it a secret that I L-O-V-E coffee. For a very long time I was strictly a mocha drinker...but my tastes have changed...and I have discovered a whole new world of unique and amazing tea beverages! My hubby has been a BIG tea drinker for awhile and I have always enjoyed a cup...but now, I am all about creating new flavor combinations for my tea! Right now, I am loving the Tea Latte and have whipped up a hot beverage using Torani Bourbon Caramel Syrup.
I have never, ever made it a secret that I L-O-V-E coffee. For a very long time I was strictly a mocha drinker...but my tastes have changed...and I have discovered a whole new world of unique and amazing tea beverages! My hubby has been a BIG tea drinker for awhile and I have always enjoyed a cup...but now, I am all about creating new flavor combinations for my tea! Right now, I am loving the Tea Latte and have whipped up a hot beverage using Torani Bourbon Caramel Syrup.
Labels:
#flavorsplash,
beverage,
bourbon caramel,
Christmas Recipes,
coffeehouse,
flavoring,
hot beverage,
latte,
printable,
recipe,
recipe card,
recipes,
tea,
tea latte,
torani,
torani syrup
Saturday, December 3, 2016
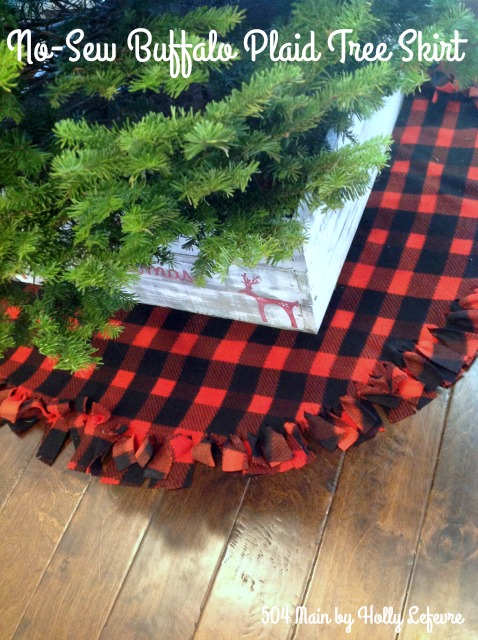
One of the easiest ways to change up the look of a Christmas tree is with a tree skirt. I have used tablecloths, blankets, ruffles, and yards of fabric. This year I wanted a new look...again. When I made my rustic scrap wood ornaments, I was inspired to try a more rough and rustic approach to my Christmas tree skirt and overall look. Well, and I just happen to LOVE buffalo plaid - any plaid actually. I surely wish I still had my double breasted royal blue and black buffalo plaid coat from Contempo Casuals!
Tuesday, November 22, 2016
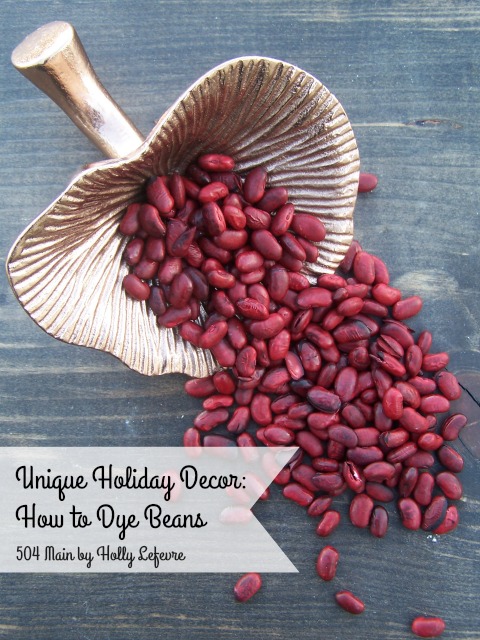
Once upon a time I dyed beans...and they looked so cool! It truly is one of my favorite DIY's every. As the beans absorbed the dye they puffed out, expanded and really turned out to look interesting and unusual. Well, this year I decided to try it again, using the color Marsala. The deep rich tones will also work well with my Christmas decor (bonus!). So go grab some beans and some dye and let's do this!
Subscribe to:
Comments (Atom)

