I am not a big door decor lady, or a big holiday decorator either.
I do love wreaths, but that is about it
(and heck I only have my screen wreath out anyway)...
but after making my birdie welcome banner...
I am sold. I love looking at that sweet banner.
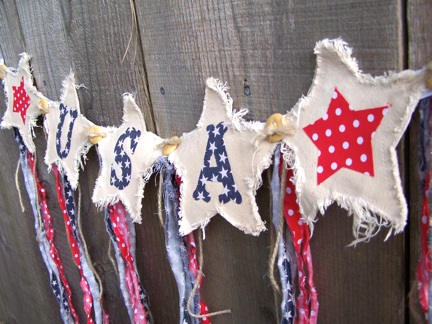
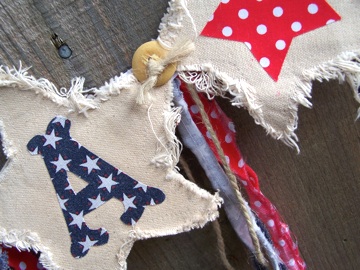
So, for the 4th I decided to make a U.S.A. banner!
I do love wreaths, but that is about it
(and heck I only have my screen wreath out anyway)...
but after making my birdie welcome banner...
I am sold. I love looking at that sweet banner.
So, for the 4th I decided to make a U.S.A. banner!
SUPPLIES:
- Canvas Corp, Canvas Shapes, Stars
- Canvas Corp, Canvas Shapes, Triangle
- Canvas CorpJute Rope, Light Natural
- Liquid Stitch and/or Heat and Bond
- Template for letters and stars. I printed them out on the computer in the right font and size...but my little helper stole them and made her own project. So I ended up using chipboard letters I had and traced a star.
- Red, white and blue fabric - assortment - use what you have!
- Ribbon for banner base.
- OPTIONAL:
- Tea bag/hot water and washing machine.
- Buttons
DIY IT!
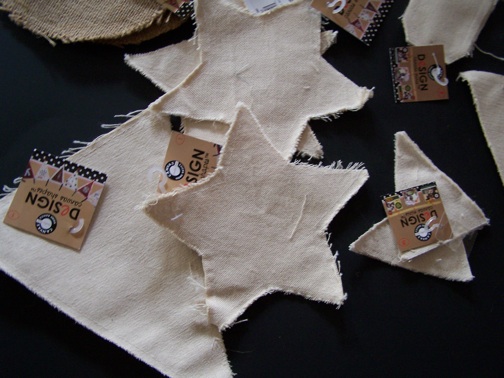
I decided I wanted some beat up looking stars: I first gave my canvas
shapes a tea bath for about 2 hours and then washed them in the machine.
I LOVE the slightly aged color and frayed edges (yeah…it worked!).
- Layout out design of the banner.
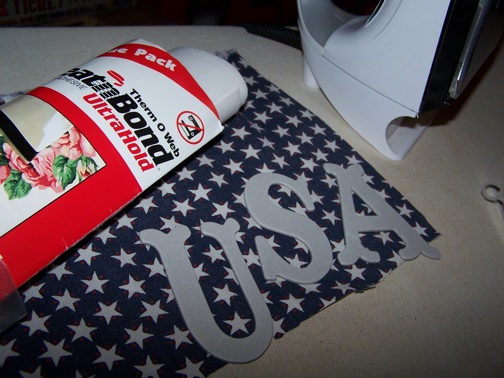
- In the meantime, applied my heat and bond to my blue and red fabric (according to package directions).
Once
applied, I traced the letters and star onto the paper backing of the
heat and bond – be sure to flip them over – you want them to be
backwards on the back side of the fabric. - See more at:
http://thediyclub.com/2011/06/hollys-usa-banner/#sthash.T9NtXBO0.dpuf
In the
meantime, applied my heat and bond to my blue and red fabric (according
to package directions). Once applied, I traced the letters and star onto
the paper backing of the heat and bond – be sure to flip them over –
you want them to be backwards on the back side of the fabric. - See more
at:
http://thediyclub.com/2011/06/hollys-usa-banner/#sthash.T9NtXBO0.dpuf
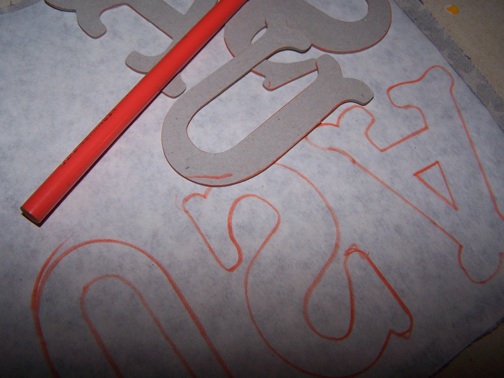
- Once applied, I traced the letters and star onto the paper backing of the heat and bond - be sure to flip them over - you want them to be backwards on the back side of the fabric. Cut out the letters and shapes
- Layout your design
- Place them on the canvas shapes. Peel paper backing off of each letter/star and press with iron onto the canvas shape.
- Once the letters and stars are applied, cut a 48" length of 3/4" grossgrain ribbon to use as the base for the banner. Lay the shapes out on the ribbon.
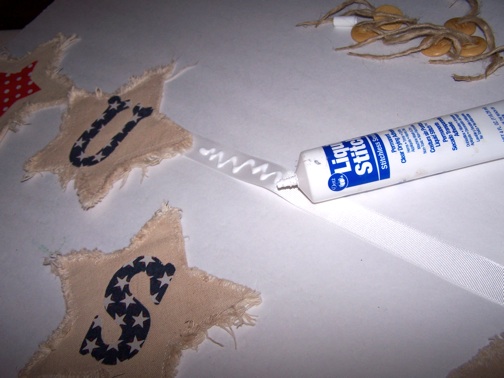
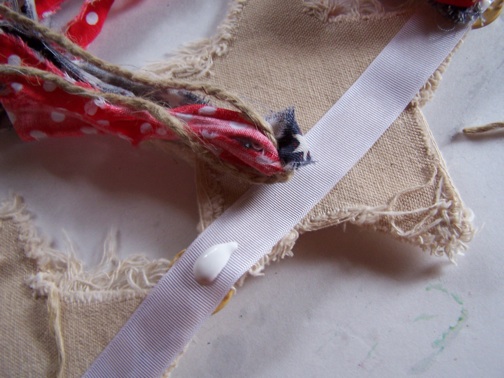
- Glue each canvas shape onto the ribbon using Liquid Stitch. Let dry.
- Thread one piece of jute twine through 6 buttons and tie off. Glue in between each canvas shape. Let dry.
- Rip strips of the colored fabric - cut small (1/2") slits along the selvage of the fabric - this should make it easy to rip all across. You can also cut the strips if you want straight lines. Try to remove the strings.
- Tie one piece of each fabric and one length of twine together. Make 6.
- Flip DRY banner over and place a dime size dollop of Liquid Stitch "behind" each button. Lay the knot from the fabric strips on the glue and let dry.
CELEBRATE!
How do you decorate for the 4th!?
Happy 4th!
Happy Summer!
Happy 4th!
Happy Summer!






Great idea! Love the canvas starts. Thanks for sharing.
ReplyDeleteSaved By Love Creations
What a fun idea and a great way to celebrate the holiday!
ReplyDeleteJo
Super cute, Holly! I love the rustic look and frayed edges. Banners are addicting to make!
ReplyDeleteI could even get this done before the weekend. Thank you for sharing another great idea.
ReplyDeleteI love your banner! What a cute idea!
ReplyDeleteThis is adorable!
ReplyDeleteHolly, it came out so great! I love the tattered tails especially!
ReplyDeleteSooo cute Holly!! I love the frayed streamers - those really finish it off!
ReplyDeleteThis is great Holly!!! Thanks for the tutorial, it's easy enough and how pretty and festive for the doors and windows! Love it! Hugs, FABBY
ReplyDeletelove this Holly. can i feature you on our new "A few Fancy Little Things" this Saturday? this gets me in the mood for july 4th!!!
ReplyDeleteLOVE IT!!!
ReplyDeleteLove the banner!! It looks great!!
ReplyDeleteRuth
Hi Holly! I've put together a round up of fun 4th of July projects on Craft Gossip today and included your post. :) You can see it here
ReplyDeletehttp://homeandgarden.craftgossip.com/6-fun-projects-for-the-4th-of-july/
If you would like a Craft Gossip badge showing you've been featured, you can grab one here :)
http://homeandgarden.craftgossip.com/grab-a-craft-gossip-button/
So cute! I wish I was crafty! Maybe I will try a halloween one...I have lots of time!
ReplyDeleteDenice
Hi Holly, I just wanted you to know you inspired me this week to make a banner- similar to yours but not quite. I did everything with stuff I had around the house. Just wanted to say thanks and if you get a chance come by and check out what I did.
ReplyDeletehttp://strictly-homemade.blogspot.com/2011/06/forth-of-july-banner-made-with-stuff-i.html
Love it! :) Featured you today at http://coffeecupsandcrafts.blogspot.com/
ReplyDelete:) Have a great July 4th weekend. :)
Love it, Holly! So patriotic and cute! Thanks so much for sharing in the DIY Project Parade! ;) I'm including a link back in tomorrow's highlights!
ReplyDeleteHave a happy 4th!
Roeshel
This is one of the cutest 4th of July projects I've seen! So cute!! I just wish I had time to make it, oh well, I'll be ready for next year.
ReplyDeletei LOVE this -- thanks for letting us feature you today!
ReplyDeletethank you for posting such a lovely project; i think our readers are going to LOVE it!!!
post is here: http://www.fancylittlethings.com/2011/07/a-few-fancy-little-things-1/