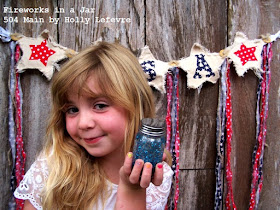
I LOVE the 4th of July! I love fireworks in the sky...or in a jar, sine we don't have them in the sky anymore! Red, white, and blue...and stars and stripes everywhere. And celebrating with family and friends. Usually we attend a chili cook-off but this year it was cancelled, so I am preparing to host a small gathering at my house...and I have to get my act together...QUICK!
▼
Sunday, June 30, 2013
Thursday, June 27, 2013
Tickled Pink No. 150
Welcome to Tickled Pink!
HELLO!
How is your summer going?
My hubby is off to Texas already....so it is just me and the kids!
(which has its good and very interesting moments).
I am scared/anxious/nervous to move
(let's just say I am not a big fan of change)
but kind of excited too...
there are a bazillion bloggers in Austin!
I am scared/anxious/nervous to move
(let's just say I am not a big fan of change)
but kind of excited too...
there are a bazillion bloggers in Austin!
Do you ever have that feeling like you will never catch up?
Or even NOT feel tired?
Man, on man that is me!
The only project I have managed to finish is
COME BACK ON SUNDAY
A VERY COOL 4TH PROJECT TO MAKE ENTERTAINING EASIERAND A BIG GIVEAWAY!!!!
THANK YOU ALL
FOR LINKING UP AND VISITING.
I TRULY APPRECIATE THE SUPPORT.
I hope to be back at being creative and more involved very soon!
oh yeah...and...
I will resume the SPOTLIGHT SELECTORS in the next week or two...
but for now let's just link up and have some fun and visit each other!
Monday, June 24, 2013
4th of July Magic: Fireworks in a Jar
Growing up the 4th of July was my favorite holiday. I loved the flags...the red, white and blue...the fireworks...the patriotism. I remember lighting fireworks in my grandparents driveway. It was so much good old fashioned fun!
We cannot set off our own fireworks where we live. Most of the big firework display have been cancelled...or the fog covers them up anyway. So I have to create a little 4th of July magic myself.
 |
| USA Banner Tutorial
So...here is the inspiration...My daughter LOVES snowglobes. I buy them anytime I see them at thrift stores. My daughter loves glitter (so do I)...so I have a feeling this project will be out year round. And believe it or not...in my overly-complicated world...this craft is pretty darn easy and quick!
|
SUPPLIES
- Baby Oil
- Small (or large jars). I used GLASS jars but you can also use PLASTIC jars for safety sake. I used small 4 oz. jars (from World Market) and a small half pint jelly jar. You can also just use any recycled jars from around the house.
- Gorilla Glue single use tubes
- Glitter (I like the big, inexpensive chunkier glitter for this)
- Sequins in various shapes
- OR use a punch and cut stars (or whatever shape you wish) out of aluminum cans...I succumbed to my love of Diet Coke and purchased a 6 pack just for this project. You can also buy thin sheets of aluminum at craft and hardware stores.
- Scissors
SAFETY FIRST: Gloves and heavy duty scissors or tin snips for the aluminum cans...if you choose do use that option.
CAUTION: If you use the aluminum cans...the edges can be very sharp. wear gloves or be very careful when cutting your can apart. I did this (NOT THE KIDS) and I punched the shapes from the aluminum (NOT THE KIDS).
MAKE IT
OPTIONAL: If you are making your "fireworks" with a punch, do this now. Wash out your aluminum cans (and let dry). Use heavy duty scissors (I did use an old knife to puncture the can near the top) and cut around the top until it is off (remember sharp edges). Cut straight down toward the bottom and then cut the bottom off. Now you have a piece of aluminum.
AGAIN CAUTION: If you use the aluminum cans...the edges can be very sharp. wear gloves or be very careful when cutting your can apart. I did this (NOT THE KIDS) and I punched the shapes from the aluminum (NOT THE KIDS).
- Place you stars, sequins, glitter into the empty glass jar.
- Fill the jar almost completely to the top with baby oil.
- Apply Gorilla Glue to the inside of the lid.
- Screw on the lid tight and let dry!
Shake away!
Enjoy the show!
Monday, June 17, 2013
Gone (House) Hunting
These last few weeks have FLOWN by!
I guess that is what happens when you are CRAZY!
(at least I am mostly in good company)
I have been on the computer...
but it is because I am OBSESSED with house hunting!
Partly because I need a place to live
and partly because it is fun to fantasize about a new place.
(even though I LOVE my old place)
And then there is the matter of selling the old place.
BLAH!
And TWO kiddo BIRTHDAYS to plan!
So I am taking this week off for my own sanity...
but I will be back with awesomeness next week!
And if you all have any tips or helpful hints for moving to another state or packing...
feel free to SHARE!
Thursday, June 13, 2013
Tickled Pink No. 149
Welcome to Tickled Pink!
HELLO!
I really miss being more "with it" over here...but real life rules.
I have been to Austin Texas house hunting
(my hopefully soon to be new home - anyone want to be a house in California?)
and then to San Fransisco...
but now I am home and just realized it is THURSDAY!
So...
THANK YOU ALL
FOR LINKING UP AND VISITING.
I TRULY APPRECIATE THE SUPPORT.
I hope to be back at being creative and more involved very soon!
oh yeah...and...
I will resume the SPOTLIGHT SELECTORS in the next week or two...
but for now let's just link up and have some fun and visit each other!
Monday, June 10, 2013
Angels and Monsters in the Garden (Outdoor Fun)
This is a crazy easy and super fun project that (almost) anyone can do...and it is pretty cheap (and I have shared this before here...but it is too good not to share again!). I first did this project with my son when we moved into our house 8 years ago. I had quite a few of (single) fence
pickets left over from our "keep the doggie from jumping the fence project," and we knew no one in the neighborhood yet so my imagination was the source of entertainment for my son.
We loved being outside in our garden, so we grabbed our fence pickets, paint, and all sorts of other objects and goodies and made garden angels.
This is a more recent recreation of that project!
(I was not a crazy blogger back then)
We loved being outside in our garden, so we grabbed our fence pickets, paint, and all sorts of other objects and goodies and made garden angels.
This is a more recent recreation of that project!
(I was not a crazy blogger back then)
Thursday, June 6, 2013
Tickled Pink No. 148
Welcome to Tickled Pink!
FIRST
I am so sorry I skipped Tickled Pink last week w/o any explanation!
So, in a nutshell...here it goes
1, I had minor surgery on Tuesday
2. It was my kids last week of school
3. I found out I am moving...out of the state..to Texas!
After recovering, I have spent every second cleaning
and purging and prepping my house for sale. UGH!
So...I have no features selected...
My kids were lucky they got dinner or that we even gave them
a break from working to eat dinner!
But the house is FOR SALE!
But the house is FOR SALE!
I will resume the SPOTLIGHT SELECTORS in the next week or two...
but for now let's just link up and have some fun!
Wednesday, June 5, 2013
Show Me Your Floss Face!
A smile speaks volumes.
Maintaining a healthy smile and mouth takes work,
that is why when I was asked to participate in the
I said "Heck Yeah!"
(I received monetary compensation and product...
but all these amazing stories and opinions are my own!)
This house has many different Floss Faces!
First there is the Toothless Floss Face!
While she may not have those front teeth...I am desperately trying to instill good oral hygiene practices with her...reminding her that her "Big Girl" teeth need to stay healthy and shiny (and sparkly - because all little girls respond to sparkly)
Tuesday, June 4, 2013
Easy Fix for Damaged Wood (How To)
I recently found out I am moving...
so I have been CRAZY cleaning, tossing, sorting, and fixing...
everything that we have not fixed in the last eight years
Please tell me I am not the only one who does this!
 |
| Image credit: iloveotto / 123RF Stock Photo |
I also have the uncanny ability to buy houses with really big master bathrooms...
but they are usually DUDS!
We spruced this one up a bit for the sale...
but we have never done anything about this door.
(Oh
yeah...here is a "warning"...
from here on down these pictures are not
pretty...I tried.)
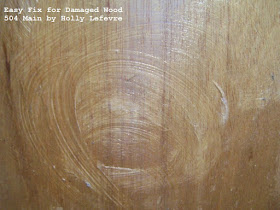
OK, first let's be honest...my door is ugly.
It is never going to be pretty...but it can be prettier.
I did this 10+ years ago in my other house.
The vanity was ginormous and had water damage from the moisture in the bathroom. Streaky, icky water damage.
I cannot remember where I learned this trick...
but it works...and it simple and cheap!
This works on doors, cabinets, and furniture (at least it has for me)
What You Need:
1-2 Rags (old T-shirt, etc.)
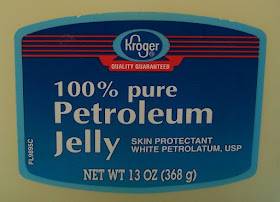
Petroleum Jelly
What You Do:
TEST THIS IS A SMALL AREA TO BE SURE IT WILL NOT DAMAGE YOUR WOOD!
 Clean the door/surface if necessary.
- Use the rag and dip it is the petroleum jelly and rub the jelly into the wood where the damage is.
- I apply mine pretty liberally (if you have animals...barricade them from the area or you will have jellied animals and hairy doors).
- Let it stand for an hour or so. It pretty much works right away...but leaving it for a bit does not hurt.
- Wipe excess of with another rag.
- Some petroleum jelly residue will remain.
- You can come back later and wipe it again to get all of the petroleum jelly off.
That is it! Damage gone!
Door (even if it is ugly like mine) looks better!
Bye...Bye...Ugly Wood!


