When Back to School time rolls around,
we are always on the hunt for a new lunch box or bag.
Unfortunately we almost always end up needing a different one soon after the school year starts. The quality of the lunch box either does not hold up…or more often, the lunch box is too small. My kids pack a large water bottle every day, and we rarely use plastic bags in the lunch. Instead we use reusable containers…and they take up extra space.
 |
| (P.S. with a few adjustments on the dimensions, a change of Scotch Colors and Patterns Duct Tape, and a flap, this easily can become a great Lunch Bag for a Boy) |
With some thought and Inspiration from the
Scotch® Colors & Patterns Duct Tape Facebook page and
Scotch® Colors & Patterns Duct Tape Pinterest page,
Scotch® Colors & Patterns Duct Tape Pinterest page,
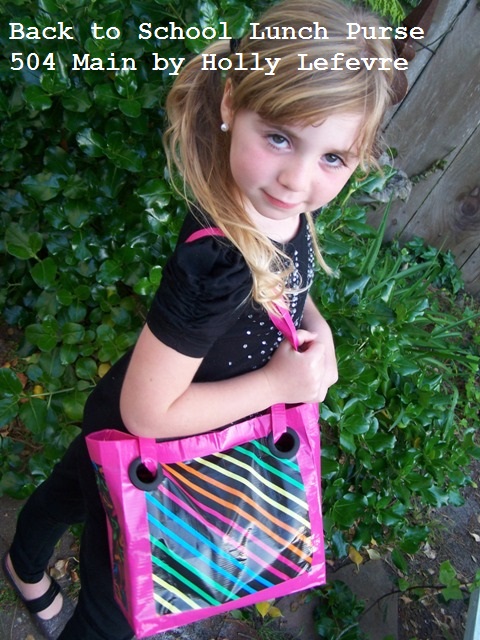
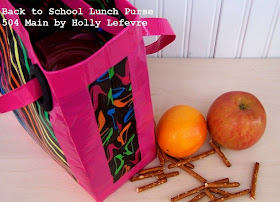
I have created a fun and stylish lunch “purse” for my daughter (everyone girl loves a new purse, right?)…that fits all of her items…looks great…and with the strength and quality of duct tape will last a long time!
Supplies for Lunch Purse
- Scotch® Colors & Patterns Duct Tape, 80's Heels
- Scotch® Colors& Patterns Duct Tape, Hot Pink
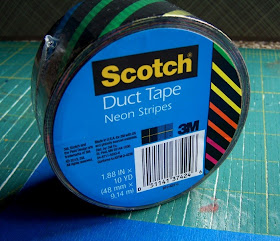
- Scotch® Colors & Patterns Duct Tape, Neon Stripes
- ScotchBlue Painter’sTape
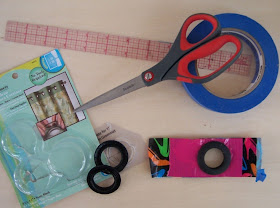
- Scotch Precision Scissors
- Ruler and/or L-square
- Cutting Mat (optional)
- Grommets (I used Curtain Grommets that I found in the sewing aisle– no tools required!)
- Sticky Back Velcro (Black)
- Chip Board (or cereal box - cut 2) cut into a 10” x 4” rectangle
How to Make a Lunch Purse
(Approximate Finished dimensions: 10 wide, 4” deep, 10” high)
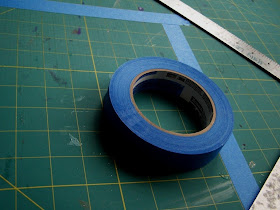
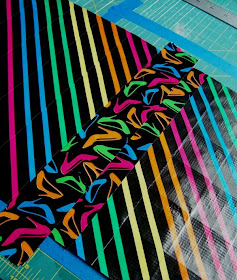
1. For this Project, the lining of the bag is Scotch® Colors & Patterns Duct Tape 80’s Heels and the outside is Neon Stripes Scotch® Colors & Patterns Duct Tape. Create 2 sheets of Scotch® Colors & Patterns Duct Tape duct tape “fabric”: each to be 14” wide by 12” long. I prefer to create a template on my cutting mat (or other surface) using an L-square and ScotchBlue Painter’s Tape. Essentially you need a 14 x 12 inch rectangle.
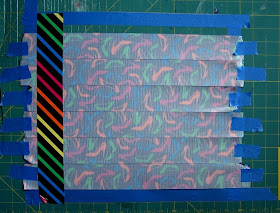
2. Using small pieces of the ScotchBlue Painter's Tape, layout out horizontal strips of the 80’s Heels, getting each piece of tape as close as possible (possibly even slightly overlapping the previous piece by 1/16”). Secure them on each side with the ScotchBlue Painter's Tape.
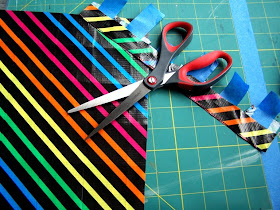
3. Using the Neon Stripes, create the top (and outside of the bag). When creating this layer, keep in mind, that you will achieve a prettier result if you match up the diagonal stripes…it is really easy to do as you lay each strip of duct tape down, you just need to go slowly and there will be some tape waste.
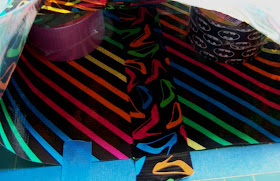
- Line up the first piece of Neon Stripes with your original ScotchBlue Painter's Tape line you used for the grid. Secure it on one end with a small piece of ScotchBlue Painter's Tape. Then (without pressing the tape down yet) unroll a length of Neon Stripes vertically, keeping the outside edge aligned with the blue grid line. Once it is straight and lined up, start at the top, but continue to hold the roll taunt at the bottom, and smooth down the tape onto the sticky surface of the bottom (80’s heels layer). Continue this process until you reach the opposite ScotchBlue Painter's Tape grid line.
- TO MATCH STRIPES: Simply look at your roll of tape and determine where to begin matching based on the top of the first layer you have already taped down. You may have to rip or cut off some excess Neon Stripes to get them to match.
4. Once you are finished with both sheets of Duct Tape “Fabric” trim the excess to get a 14” x 12” rectangle (or as close to it as possible – just make sure the sheets are the same size if there is some size difference).
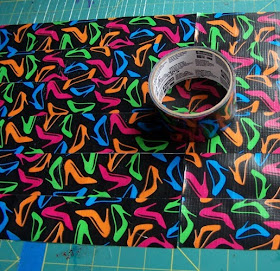
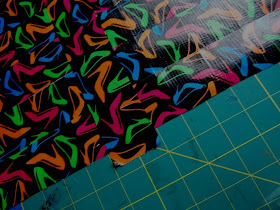
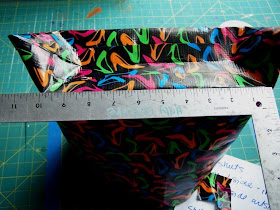
5. Lay the two sheets with the 80”s Heels facing up, line up the sides and using another strip of 80’s heels, tape the two sides together (essentially you will have about 1” of Duct Tape on either side of the line where the two pieces match). You can add another layer of Duct Tape if you like. One you tape this ONE seam, flip it over and tape the outside seam (using 80’s Heels on Neon Stripes) – see last photo in this step. You will tape the other outside seam in step 7.
6. Flip the large piece over (stripes are facing you now) and bring the remaining two edges together. Now the 80’s Heels will be facing you. Use another strip of 80’s Heels and secure the seam of these two sheets of Duct Tape.
7. You now need to secure/cover the seams on the outside of the bag. I kept the bag “inside out” with the 80’s Heels on the outside as I did this. I just find it easier to only have to turn the bag one time. If it is easier for you, you can turn the bag so that the strips face you, tape the side seams, and then turn the bag back inside out.
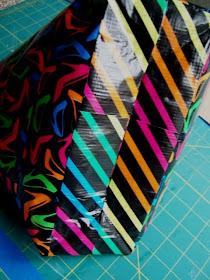
- I propped up the bag (which is cylinder like now) with 2 rolls of Duct tape, and using a strip of 80’s Heels (I decided to contrast my sides with 80’s Heels and it also made it possible to save tape, as you then do not have to match the strips on the side of the bag), tape the side of the Neon Stripes. Then you will add one more strip on EACH side. Line up the strip with the “seam”/cut edges of the two sheets (which is harder to see now that you have covered it once, but still visible) and lay a piece of Duct Tape down on each side of the seam. You will use 3 strips for each “side” of the bag – this will create an approximate 4” side panel. Repeat with the opposite side.
8. Fold the bag in half (on the original seam line) and tape the bottom, by placing half of the strip of Duct Tape on one side of the fold and then folding over to secure it to the other side. Now, place one strip of Duct Tape on each side of the fold (to reinforce the bottom).
9. Flip the bag over with the open side face down and the (just made) bottom up, facing you.
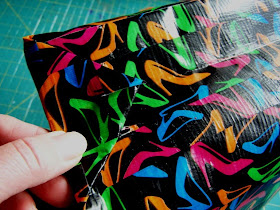
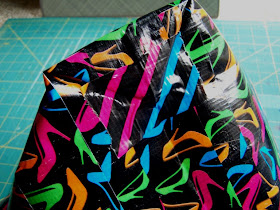
- The bag will have “points” on each side. Grab these points and fold up and in. The fold should be at about the 2” mark in from the point. Leaving 10” for the base length of the bag. This fold will automatically create the vertical folds for your 4” bottom.
10. Fold the points in and secure with tape.
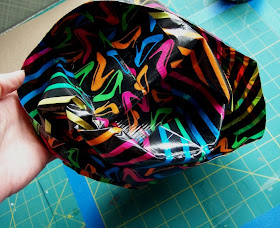
12. Turn the bag to the right side (Neon Stripes). The Duct Tape is quite sturdy, so feel free to go this without worry!
13. Adding the trim at the bottom of the bag and along the sides can be done in the same Duct Tape as the outside (or inside) or in a contrast color such as the Hot Pink.
- First run strips of Hot Pink Duct Tape on each corner of the bag (Use the ScotchBlue Painter's Tape to mark guidelines if you need them). There will be about 1” on each side of the fold. Do this on all four side seams and trim at the top and bottom.
- Repeat this same process along the bottom edge of the bag. You will do it in four strips; 2 for each short side and 2 for each long side. When you get to a corner, fold them over at a 45 degree angle (like then you wrap a package).
14. Use the Duct Tape of your choice (Hot Pink) and place 10” strips of this tape along the bottom of the bag to secure these corners and finish the bag.
15. When adding trim to the top of the bag, I found it helpful to use the ScotchBlue Painter's Tape again, and measure down 1” from the top of the bag and create a design line with the ScotchBlue. Then you can easily line up the contrast trim (Hot Pink) with this line and smooth all around the bag. Once the tape is secure to the outside, hold the bag taunt and fold over the tape to secure on the inside of the bag. This step will nicely finish off all the top edges of the bag.
17. Create straps by folding 24 inch lengths of Hot Pink Duct tape into thirds (again using ScotchBlue to secure one end is really helpful). Run the ends of the straps from the outside into the bag. Use 2-3 inch strips of matching tape to secure the ends together.
18. Add 6” of Sticky Back Velcro to the top edge of each aside of the bag. This should be placed between the two grommets on the pink trim inside the bag.
19. Cut a piece of chip board to be 10” by 4” (double check the size of your base…it may need to be a bit larger or a bit smaller. Simply wrap strips of Duct Tape around it to cover and protect the chipboard.
And that is the last step to creating a fun, funky and stylish
Back to School Lunch “Purse!”
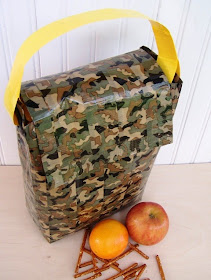
How about a Boy version?
Like I mentioned above...just swap out some more "manly" selections of
Scotch® Colors & Patterns Duct Tape!
Like I mentioned above...just swap out some more "manly" selections of
Scotch® Colors & Patterns Duct Tape!
Need some more stylish inspiration? Be sure to visit
This post is a collaboration with Scotch® Color & Pattern Duct Tape Brand. Join the community at Facebook.com/scotchcolorsandpatterns or visit scotchducttape.com to learn more.









Absolutely amazing! I love the tape colors too.
ReplyDeleteAwesome! Love this! Not sure if I would have the patience to do it but I am pinning it for future reference!
ReplyDeleteHolly, these turned out so adorable! What cool kid wouldn't want to take these to lunch?!! I have to show these to the duct tape enthusiasts in my home! I'd love for you to link these up to our All Things Thursday Link Party. I know they'd be a hit! Hope to see you there!
ReplyDeleteBlessings,
Nici
Fantastic! Love duct tape! ;-)
ReplyDeleteWhat a lovely idea! I really like it. I need page for my job, I asked a web design company ELCO PLANET (www.elcoplanet.com) to develope the page for me.. I was just interested for web hosting..I can see your blog , can you please advice me about web hosting provider.. have you ever heard for www.elcoplanet.com offering hosting, alpha reseller hosting... ? thanks a lot
ReplyDelete