Pillows are the best way to dress up or change up a space!
If you are like me, I can never find exactly what I want...
but now I can make my own DIY Designer Pillows (and you can too)!
I recently had the opportunity to try the NEW Paint-a-Pillow kit,
and had so much fun making some new pillows for my home!
So...I decided to make outdoor pillows. Yes, I know the temperatures are creeping down, the rain or snow is falling and most people are dreaming of cozy fireplaces...but dang it, I have been waiting months for my pool and deck to be done and I am going to enjoy it (with the help of a heater and a fire) and decorate it when it is done. We already have some furniture...and I just could not resist making some pretty pillows.
Making designer pillows is a breeze with Paint-A-Pillow. This sister company of Cutting Edge Stencils, makes it easy for ANYONE to create unique pillows using their pillow kit.
You will now believe how SIMPLE Paint-A-Pillow has made this process!
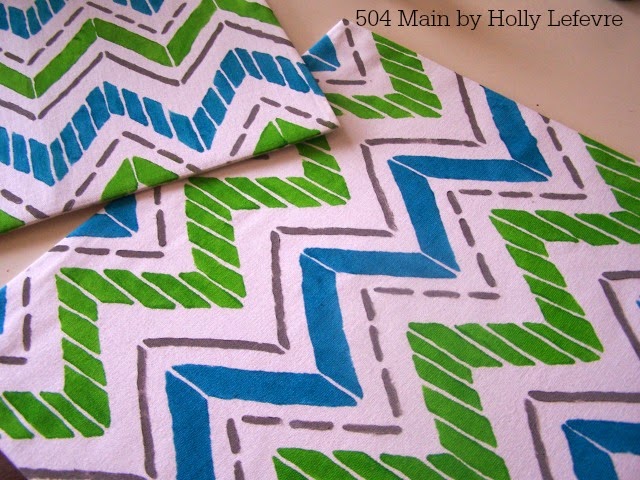
First I went online to Paint-A-Pillow and selected my stencil. I chose the Tribe Design. There are so MANY amazing stencil designs to choose from - modern, natural, floral...there is something for everyone!
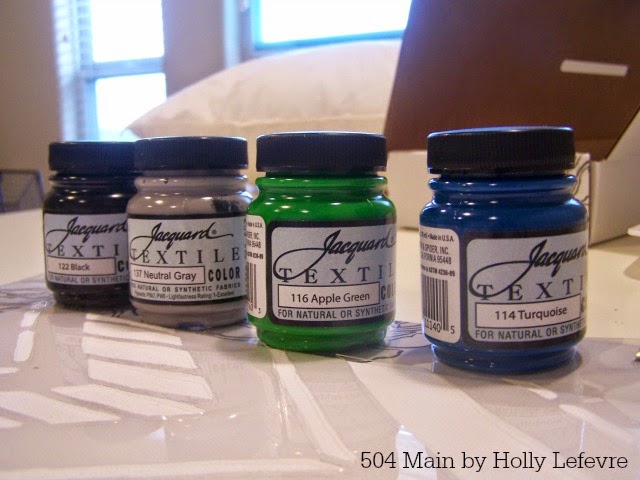
The kits come with all the supplies you need to make one pillow: a stenciling frame (which is so awesome!), 17 x 17 zippered canvas cover (in natural or white), pillow form, stencil, mini roller and stencil brush, and fabric paint of your choice. One color comes with your kit, but I selected a few more.
You can also add items on such as additional paint colors or studs, rhinestones, or tassels...or even more pillows!
Tips before you start:
- There is a great Paint-A-Pillow video with step by step instructions. I highly recommend that your watch it before beginning.
- If you use one color of paint, using the foam roller is a great option for your stencil. I decided to use three colors, so I used the stencil brushes.
- Begin with your lightest color and work into your darkest.
- You may need to use the fingers on your other hand to hold the stencil down firmly for some of the smaller details. And for the edges.
I truly think the stencil frame is what makes painting this pillow so flawless.

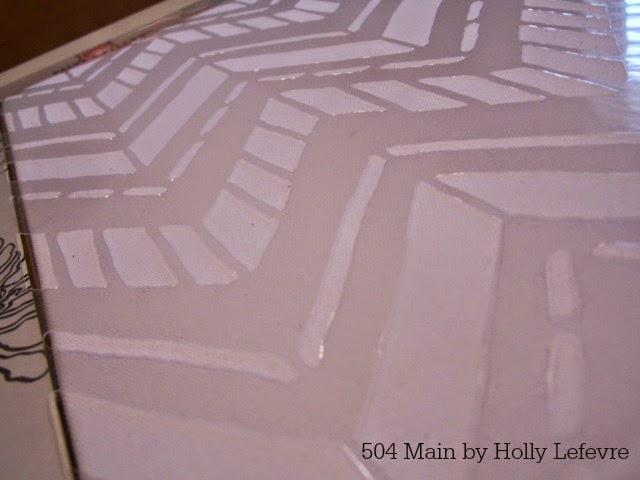
The pillow fits into the frame perfectly (there is even a special slot that shows you where the zipper goes), and the stencil lays right on top, just line up the holes on the stencil with the tabs on the frame, and "lock it" into place. (And the whole set up actually arrives ready to go!)
Mix your paint up well and place some on a tray. Work the paint into your brush, but make sure you do not have too much paint. When your kit arrives, there is a small stencil and fabric scrap in it - use this to get the hang of the painting.
I began with my lightest color, the grey.
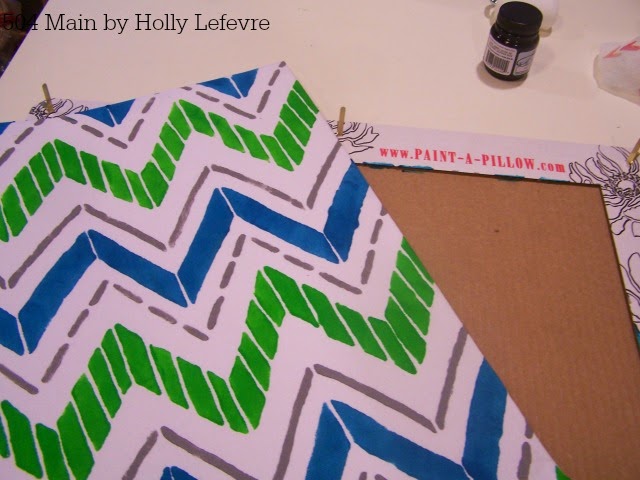
Then added my other 2 colors.
Once I painted my entire pillow...
I removed it the stencil...Then the pillow from the stencil frame and let it dry completely.
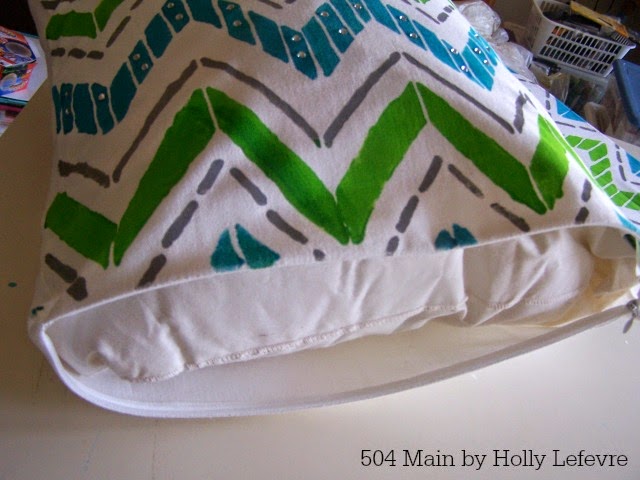
I washed my stencil and prepped my second pillow. I used the same technique and same colors, I just mixed the colors around. Let dry.
Once the pillows are dry, remove the cardboard inserts and heat set your design by placing a clean cloth over the pillow and ironing the entire design.
Once the design was heat set I added some heat set rhinestones. I placed them (section by section), covered them with a cloth and set the stones by placing a hot iron on the rhinestones for 30 seconds+. Just as I changed up the colors on each pillow, I changed up the rhinestone design as well.
Now all that is left is to insert your pillow form and decorate!
If you want to come to Texas, you will find me
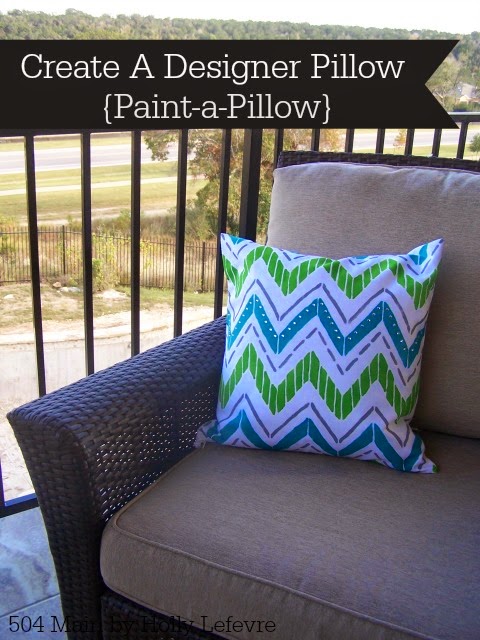
sitting on my deck with my beautiful pillows! Most of my house is neutral with a pop or two of
color...but for my outdoor area, I really wanted bright, happy colors
and patterns.
Here is your opportunity to win one of these amazing kits!
Open from 11/19/2014 through 11/26/2014 at midnight central time
Open to U.S. Only







Adorable, Holly! I love the color combo. The pillow kit is AMAZING!!!
ReplyDeleteI'd definitely choose this design! Beautiful results
ReplyDeleteI have been on the hunt for that perfect pillow for our bed and now I find out, I can create my own? LOVE!
ReplyDeleteOH my gosh! I love this! I've been looking at the site for 10 minutes already and have no idea which one I will pick! I love them all! I'd probably go with one of the modern ones. I liked Zagora, Cascade and Blast. Seriously though, I love them all!
ReplyDeleteThis is so much fun! Lots of wonderful designs. It was hard to choose just one! Thanks for the chance to win! :)
ReplyDeleteI think I would have a hard time choosing just one... Love tribe paint or drifting arrow.
ReplyDeleteHolly,
ReplyDeleteI am excited to see Paint-A-Pillow product on your blog today. I would love to make Perfect Catch from the Beach Collection. It would be a perfect addition to my lake home bunk room. I could choose many more too but you only asked for one. I am Pinning your blog because I am in Love with your work and this product.
Love this product!
ReplyDeleteAhhh! These are so cute! I love the kids' ones - the daisies and the butterflies, but HOW CUTE IS THE HEDGEHOG pillow!
ReplyDeleteI love the hedgehogs kit and the HOUNDSTOOTH PAINT-A-PILLOW KIT
ReplyDeleteHolly, I am loving the product. Awesome and so easy!
ReplyDeleteI found so many on their site that I would love to do. Beautiful pillows.
ReplyDeleteThis is so cute! They have so many great designs to choose from. I really like the Dandelion Paint-a-Pillow Kit
ReplyDeleteThey have so many cute ones, but I love the Diamond Damask case.
ReplyDeleteI liked so many. The Blast paint a pillow in reds and oranges was awesome.
ReplyDeleteI like the birds in trees kit!
ReplyDeleteI like the wispy leaves design, but it's sure hard to choose!
ReplyDeleteI love the peacock feathers one, as well as the design you featured in the post!
ReplyDeleteI love Stephanie's lace in the classic collection.
ReplyDeleteI love the Ikat Saida Paint-a-Pillow Kit
ReplyDeleteThere are so many that I like but one that really caught my eye was the POPPY FIELD PAINT-A-PILLOW KIT.
ReplyDeleteI like the lobster paint a pillow
ReplyDeleteI would like to have the Hedgehogs Paint A Pillow Kit.
ReplyDeleteNancy
allibrary (at) aol (dot) com
The hedgehog!
ReplyDeleteThe Butterfly Circle kit! So cool!
ReplyDeleteI like this kit http://paintapillow.com/index.php/paint-a-pillow-kits/ethnic-diy-designer-pillows/indian-arrows-paint-a-pillow-kit.html It is the Indian Arrows kit
ReplyDeleteFOSSIL SHELL PAINT-A-PILLOW is my favorite. It would look great on my bed!!
ReplyDeleteI would choose the Tuscan trellis.
ReplyDeleteMy favorite is the Charlotte Paint A Pillow Kit, thanks!
ReplyDeletekimberlybreid at hotmail dot com
These are so cool! I love them all, but I really like the starfish one!
ReplyDeleteWe love the starfish pattern one! Our bed room is done in beach theme so this is cute.
ReplyDeleteI would love to have the "Poppy Field Paint-a-Pillow Kit" from Paint-a-Pillow. It would go great with my home and it looks like such fun to make!
ReplyDeleteI like the peacock feathers kit.
ReplyDeleteI like the peacock feathers design!
ReplyDeleteI like the HARLEQUIN PAINT-A-PILLOW KIT
ReplyDeleteI would like to choose the RETRO FLAME PAINT-A-PILLOW KIT. I would let my daughter make it.
ReplyDeletei really like the the hedgehogs kit
ReplyDeleteI really love the Alessa Scroll Paint -A-Pillow kit.
ReplyDeletePeacock feather kit
ReplyDeleteI like the BLAST PAINT-A-PILLOW KIT
ReplyDeleteI would pick the Going To Seed Paint-a-Pillow Kit
ReplyDeleteI really like the Peacock Feathers Paint-a-Pillow Kit (:
ReplyDeleteOh wow, so many awesome ones, favorites in order that I saw them, Bird on a Branch, Poppy Field, Candy Cane, Starfish Pattern and Dandelion! If I win, I will put these names in a hat and draw one!
ReplyDeleteI would choose the Anna Damask kit in green but it was hard to decide.
ReplyDelete