Today we had a neighborhood Easter Egg hunt and my daughter wanted a special "something" to wear. It was a pretty casual party so I decided to make a Bunny T-Shirt inspired by my Bunny Banner. Now of course, I had my own ideas...but my daughter had HER OWN ideas too. She won (mostly) and I admit her idea to put stripes on the bunny was a good one!
This shirt is really easy to make....I promise. I made the whole thing in about 45 minutes, and that includes my taking notes and figuring out the tutorial. So, yes there is still time for you to surprise you own cutie with a shirt...and I totally think this could work for a boy too (in different color combos!)
Supplies
- Blank T-shirt, washed and dried. (I bought this one at Target)
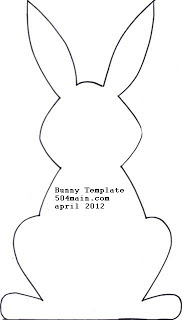
- Bunny Template (I used this template for my adorable Bunny Banner too)
- Foam Pouncers (I prefer them for this project)
- Fabric Paint. I used DecoArt So Soft in Tangerine and Bright Coral
- X-ACTO Knife and cutting mat OR scissors
- Freezer Paper (found with foil/parchment paper/cling wrap in the grocery store) OR cardboard (like from a cereal box)
- Blue Painters Tape or Masking tape
- Iron, ironing board, cloth to use for pressing
- Optional: white pom pom an safety pin or fabric glue OR ribbon and safety pin or fabric glue.
Make It
- Prepare your stencil:
- Print out the template. I used the size as is, but you can resize the bunny.
- A. If using cardboard, trace off the bunny shape and cut it out in the cardboard. You should have a square of cardboard with a bunny shape in the center.
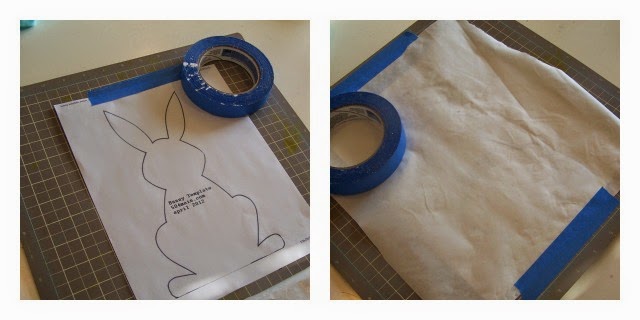
- B. This is what I did...use freezer paper. On the non-waxy side (in this case it does not matter as much because the design ins symmetrical, but in some cases it would matter what side you trace the shape on) trace the shape.
- I taped the template to my cutting mat and then taped the freezer paper over it. I could easily see the bunny shape and then I cut it out with an X-ACTO knife.
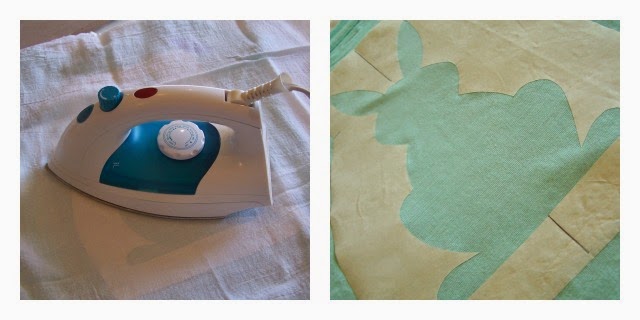
- Heat the iron to cotton.
- Fold shirt in half and press to show the center of the shirt (this helps you get the design centered).
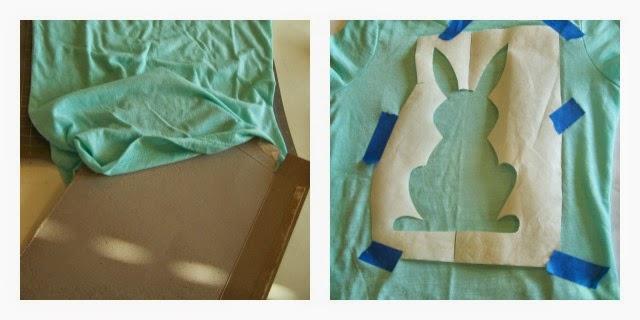
- Place a piece of cardboard inside the t-shirt (to prevent the paint from soaking through to the back of the shirt.
- Use masking (painters) tape to place the stencil on the t-shirt. I lined up the center of my design with the center of my t-shirt
- Place a cloth over the t-shirt and press the (freezer paper) stencil to the shirt - with the WAXY SIDE DOWN.
- I PRESSED IT IN THE CENTER FIRST TO GET IT TO STICK, THEN REMOVED MY MASKING/PAINTERS TAPE.
- Press the freezer down all over. Remove pressing cloth.
Now let's paint...
I was going to paint the bunny one color, but my daughter insisted on stripes. At first I was like "Really?" but I think it turned out so cute!
- Use the Tangerine (or the lightest color you are using) So Soft and pounce the color all over the bunny. Let dry (it doe snot have to dry completely, but needs to be pretty dry).
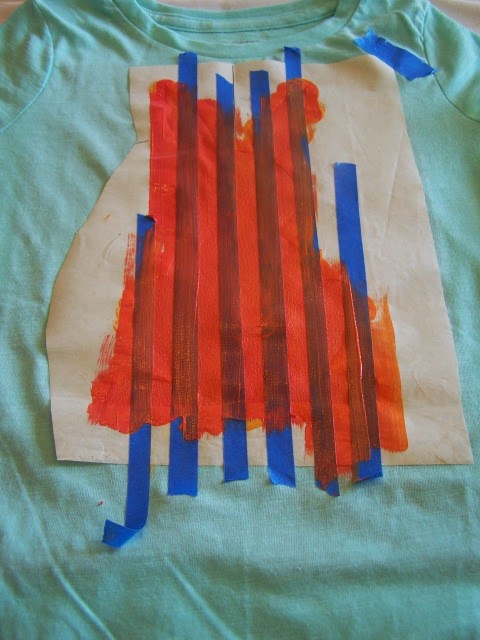
- Using my X-ACTO and painters tape, I cut the tape in half, giving my about 1/2" strips of tape. I lined the first one up with the center of my design and then just eyeballed the rest, making the stripes about 1/2" all around.
- Using the Coral (or your darker color) fill in the areas not taped off.
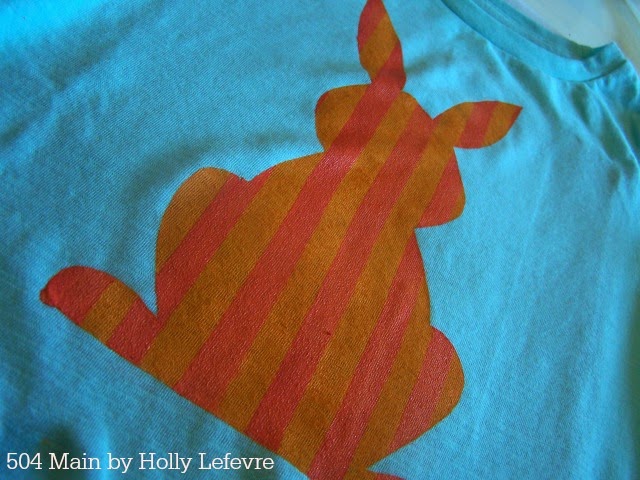
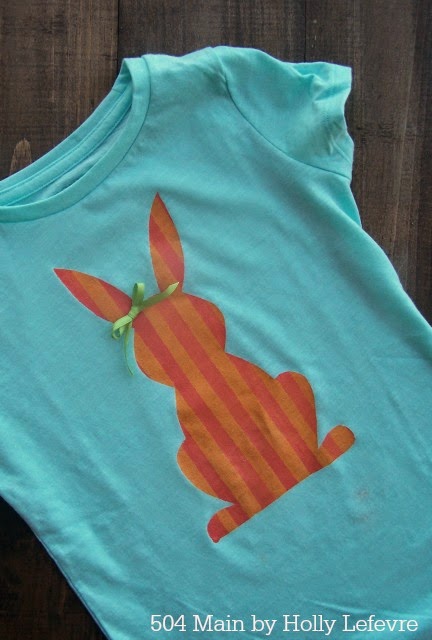
- Remove tape and freezer paper...and Voila!
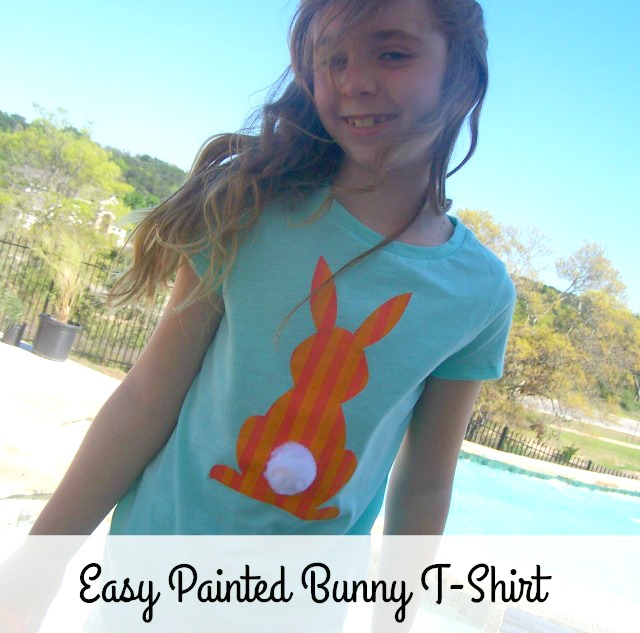
Now, add accessories if you want...a big puffy pom pom and fabric glue for a tail
Or
Some ribbon for her ear..or for a bow tie (for a masculine touch).
NOTE - I used a safety pin to attach my accessories so that the t-shirt would be easier to wash.
Is she, I mean, the t-shirt adorable!







No comments:
Post a Comment
Thanks for stopping by and joining the conversation! I sure hope you come back for more!