Creating personalized gift wrap in one thing my daughter loves to do. I wrap the gifts in plain brown craft paper and then let her have at it with markers, stickers - anything she wants! Well, why should she have all the fun, right? Now, I have never been know for my own gift wrapping skills, but lately I have been a bit obsessed with changing that reputation - and what better way to do that than to let my imagination and creativity run wild, like my daughter does! I get to cut and punch and glitter and tape to my hearts content. Oh, and I get to go shopping not only for the gift but for fresh crafting supplies, like Scotch® Brand products.
As I mentioned, gift wrapping has been my daughters are of expertise, so naturally she gave me the inspiration for these designs. She actually created something very similar for a project she was wrapping and I thought it was a genius idea. This wrapping can be personalized with just about any color paper or glitter you can find! I might just wrap everything like this, because I am a tad bit in love with polka dots and circles right now....and of course glitter!
I stopped by Walmart to pick up a few birthday gifts (it is birthday season here!) and while I was there also picked up some new paper designs/colors for the wrapping. Then, I hopped over to the crafting aisle to pick up a few of my favorite Scotch® Brand products, Double Sided Tape and Magic Tape (you really can never, ever have enough of either of these tapes), but I also discovered that Scotch® Brand makes a Precision Titanium Utility Knife and decided to pick that up as well. It is so convenient that these Scotch® Brand products, as well as Command™ products are now available in the crafting aisle at Walmart - like a dream come true!
With all the supplies purchased, it was time to wrap! My secret (shh, don't tell!) to designing an AMAZING package is to begin
with a simple base using Kraft paper and add unique, one-of-a-kind embellishments. It is also important to have quality supplies and tools. For as long as I can remember I have turned to Scotch® Brand - from masking
tapes to spray adhesives and everything in between, I have always relied on Scotch® Brand. I lived for Magic Tape when I was in design school! No matter the task,
there's a Scotch® Brand product to match.
Supplies
- Scotch® Brand Double Sided Tape (found in craft aisle)
- Scotch® Brand Matte Finish Magic Tape (found in craft aisle)
- Scotch® Brand Precision Titanium Utility Knife (found in craft aisle)
- Cutting mat (or protected surface for using Utility Knife)
- Hole Punch (found in office supplies)
- Wrapping Paper - Kraft Paper (found in shipping supplies)
- 12 x 12 Cardstock or Scrapbook Paper - I used a solid and a dotted paper (found in paper crafting)
- Glitter - your choice of colors. We used silver and blue (found in craft aisle)
- Ruler (found in office supplies)
Make It - Paper Ribbons
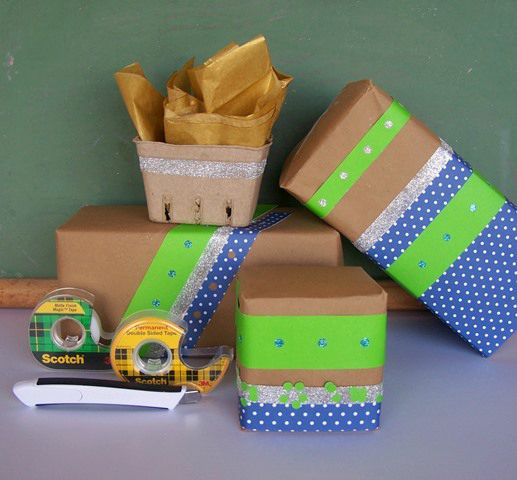
I have so many favorite things about this packaging. I just love the different versions of paper "ribbon" and how they all work together to create an interesting design. You can mix and match and use these ideas in so many ways. I worked on a cutting mat and scrap piece of paper to make these "ribbons" - Be sure to work on a protected work surface.
#1: Simple Dotted Paper "Ribbon"
- Use the Utility Knife to cut strips of your cardstock. I cut 3/4" strips (by 12" long) and 1 1/2" strips (by 12" long)
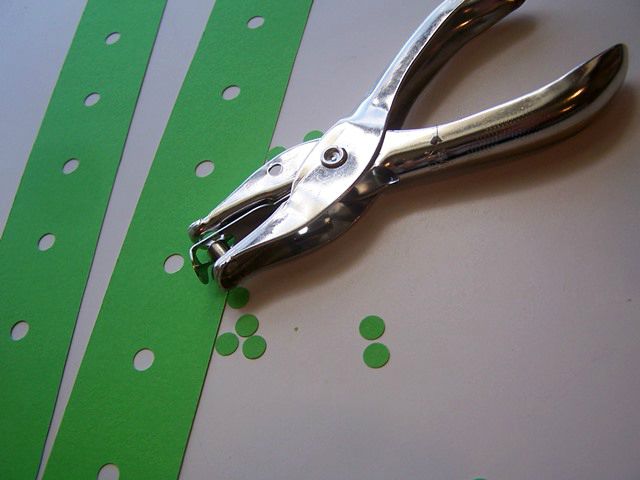
- Punch holes in the center of each ribbon about 1" apart. If you need a guide, flip the "ribbon" over (to the back) and use a ruler to mark the centers and spacing increments.
- SAVE THE PUNCHES to use in the next ribbon version.
- Place a strip of Magic Tape the length of the ribbon, covering all of the holes (NOTE: you can use Double Sided Tape for this as well - see NOTE below).
- On a scrap piece of paper place a line of glitter.
- With the back side of the ribbon facing up (the side that you can see the Magic Tape and is NOT sticky) place the ribbon in the glitter, gently pushing on the holes to get the glitter to adhere. Tap lightly on scrap paper and gently brush off the excess glitter from the front...you should have beautiful sparkly dotted paper "ribbon."
- Before adhering this ribbon to the package, place a length of Double Sided Tape on the BACK of the ribbon to adhere it to the package.
- **NOTE: you can use Double Sided Tape for this (and skip the Magic Tape) but you need to be very careful with the glitter adhering to the back of the tape (the side that goes on the package). It is a bit trickier to maneuver the double sided tape with the glitter but it can be done.
#2: Glittering Dotted Paper "Ribbon"
- Take a length of Double Sided Tape (about 10-12"), and hold one end in each hand, and "pick up" the circle punches on the tape - it will be a random pattern.
- On a scrap piece of paper place a line of glitter, and gently press the tape into the glitter - BE CAREFUL to not get glitter on the back side. (If this seems difficult, use Magic Tape instead and when you are ready to adhere to the package add Double Sided Tape to the back.)
- Now you have a Glittering Dotted Ribbon.
- On a scrap piece of paper place a line of glitter.
- Take a length of Double Sided Tape (about 10-12"), and hold one end in each hand.
- Gently press the Double Sided Tape into the glitter - BE CAREFUL to not get glitter on the back side. (If this seems difficult, use Magic Tape instead and when you are ready to adhere to the package add Double Sided Tape to the back.)
- For added interest, I also cut some strips of the polka dot paper in 1 1/2" lengths, and a wider piece that was 6".
- Wrap the gifts in Kraft Paper using Magic Tape or Double Sided Tape. With the Double Sided Tape you wont see a thing, but if you are a wrapping newbie, the Magic Tape works well and is a bit easier to use (but it is not hidden).
- You May Need to used multiple lengths of each ribbon to go around your gift depending on the size of the gift. Just use the Double Sided Tape or the Magic Tape to secure them together.
- I used the Glittered Ribbon to secure the top edges of my paper to the packages - it creates a beautiful finish.
- Place your amazing ribbons on the package to create your own design!
Be sure to check out all the amazing summer craft ideas using Scotch® Brand and Command™ and don't forget to check out the crafting aisle at your local Walmart! There are fabulous #ProjectAmazing tutorials added all the time!
Now, tell me your secrets...how do you use your favorite Scotch® Brand products for crafting and creating?


Love the bright colors and the idea for the tape to make the glitter polka dot ribbon! #client
ReplyDelete