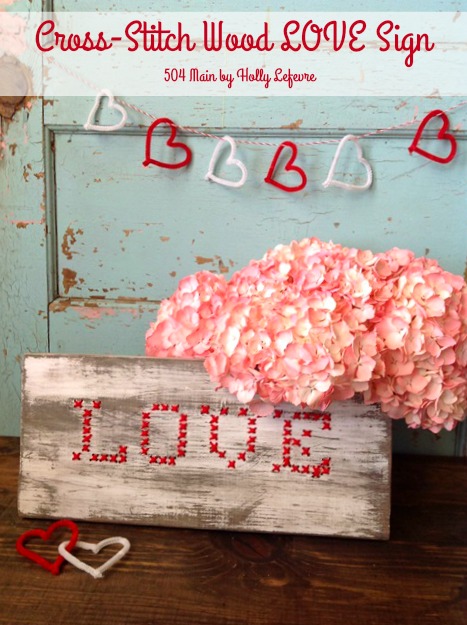
I love wood signs. It's one of my favorite ways to decorate and express myself. I am always trying to come up with new ideas and new ways to incorporate all of my loves -textiles and fibers, wood, power tools, paint, etc. - into crafts and projects. This wood cross-stitch LOVE sign for Valentines Day (or any day), does just that and is so dang cute (if I do say so myself)!
I promise this sign is pretty darn easy to make and even my husband liked it - now that's saying something! I had all the supplies, and if you craft, you might too.
- Paper word (LOVE) template. You can download it HERE
- 1 board: I used 1x8 cut into a 16" length (it was a piece of already stained scrap wood)
- Drill
- 7/64 drill bit (You may need a larger bit, depending on your needle size - check it!)
- Red yarn (I used super cheap red yarn I already had)
- Tapestry (or carpenters needle - thicker and stronger than a sewing needle)
- Spray adhesive or tape (I used spray adhesive)
- Sand paper or sander
- Scissors
- Americana Chalky Finish paint in Everlasting and Creme Wax (or sealer)plus paint brush and rag
NOTES: I printed my word out on legal paper for size. You can adjust the size of the word to your liking just remember that means smaller drill holes and drill bits. The smaller you get with the wording, the more precise and careful you need to be with the drilling.
Make It
- Cut your board to size(16" L)
- Stain and your board and let dry (I already had a stained board and I painted after I drilled).
- Print out the LOVE template.
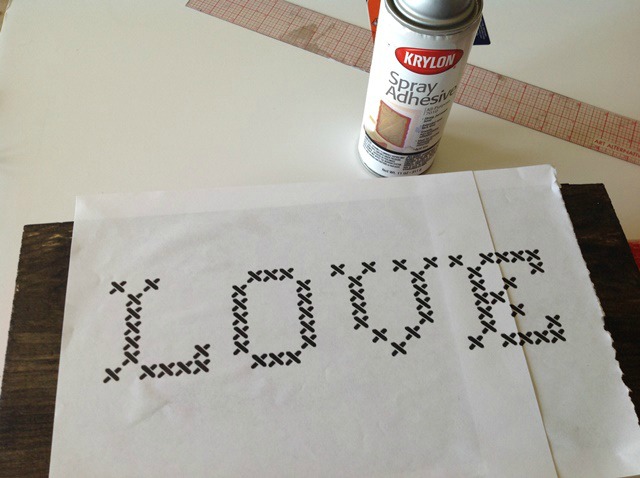
- Adhere the template to your board (make sure it is centered side to side and top to bottom). I used spray adhesive for my paper, but tape works too. I liked the spray adhesive because it really held down everything.
- Begin drilling. This can be tedious, but only took me 20-30 minutes. Be sure to drill at the end of the black "x" and not outside. I did make 2 mistakes and was able to fix them (the one on the E bugs me a bit...but what was I going to do...I was not starting over - we'll call it character, ok?). One if more noticeable than the other.
- CAUTION: when you drill protect your surface. This drill bit I used is small but it will damage a table top, etc. I actually stacked my board on top of a couple of scrap pieces of wood to avoid damaging anything.
- Drill all the "x" in the letters completely. Stay "in the lines."
- Sand front and back to avoid getting splinters as you sew.
- I gave my board a quick/rough coat of Chalky Finish Paint in Everlasting (DecoArt). Let dry.
- Sand the edges and all over the board for your desired look/finish
- Finish with a wax or sealer. Let dry.
- Thread your needle with the yarn (and knot the end of course) and start sewing.
- I simply sewed one "x" at a time and moved on to the next. I also concentrated on one letter at a time, only making the yarn long enough to finish one latter - otherwise that's a lot of yarn to deal with!)
EDIT: I have been asked to show what the back looks like. Honestly mine is a bit messy but I think you get the idea.
Isn't it super cute? I so love this look and this process...I see more words in my future!
But I have to show you the creation from my friend Randi at Dukes and Duchesses. I thought I was a genius when I made this, hopped on Facebook and saw I had a genius friend too. I love her heart and her process is a bit different than mine...so go check it out.
Have you created anything amazing for Valentines yet?


This is SO CUTE!!! LOVE IT!!
ReplyDeleteLove it! Such a great idea!!
ReplyDeleteLove it! Such a great idea!!
ReplyDeleteHello, I love this and wondered how you finish the stitches on the back please? I would love to make some for gifts so any help you can offer would be appreciated. Thank you Elaine.
ReplyDeleteElaine, I do not have an email for you. I'd love to send you a photo of what the back looks like. Each letter is knotted on the back to begin the letter an knotted to finish. I just went in a logical order to sew the x's and it looks just fine (in my opinion)
DeleteThank you for your helpful reply. I wondered if you would add a photo of the back to the tutorial. Kind regards Elaine.
DeleteI just added it Elaine. It is toward the bottom of the post/tutorial. Hope it helps.
DeleteThank you. Kindest regards Elaine
DeleteIt is very beautiful wood love sign. I will try must to make it. I've learned something new coming from you.
ReplyDeleteDonald