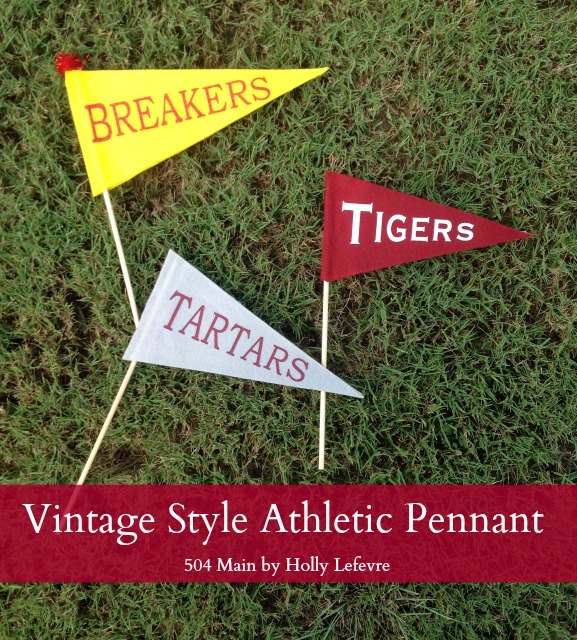
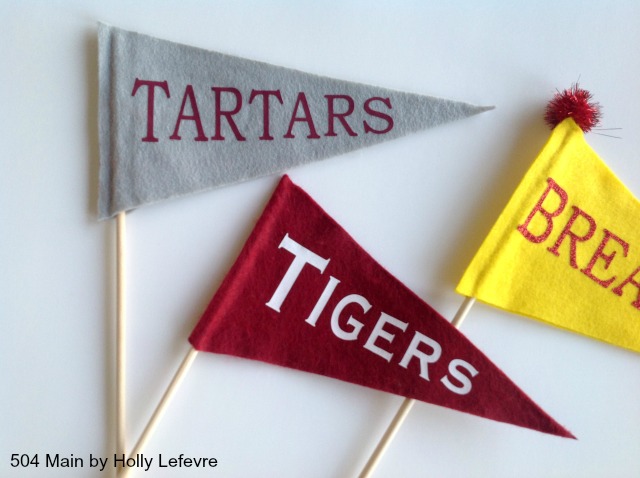
It's Homecoming time here in Texas (well, I guess all across the U.S. for that matter). Homecoming in Texas is a little different than Homecoming where I grew up in California. We had a football game and a semi-formal dance...BUT, here there are mums - do you know what I am talking about? If not, I just really cannot explain it fully...just read "12 Things Non-Texans Need To Know About Homecoming Mums". Then there are parades and of course the football game...because...it is TEXAS! Because I am trying to fit in here, we are going to the parade and I made these little pennants that sort of evoke a vintage feel to wave around like maniacs during the parade (because we will not be wearing mums and looking like maniacs, just kidding, I actually like the idea of mums).
So...if you have a Homecoming event coming up, a sports banquet, a sports themed party or even a regular ole sporting event, these Athletic Pennants are a great way to celebrate....and you can whip them out. I made like 12 in a hour. Here's how....
Supplies
- Felt (in team colors). I used the packaged felt but you can make the sheets work too. There are so many colors!
- Heat Transfer Vinyl (If you do not want to work with heat transfer vinyl, here are some options)
- You CAN use heat transfer vinyl WITHOUT a craft cutter by cutting your design with a craft knife.
- Stencil and paint
- Iron on letters
- Felt letters (print out the letters in the font you want and cut the letters out of a coordinating felt)
- Electronic Craft Cutter (optional) or Scissors
- Wood dowels
- Hot glue gun and hot glue
- Iron and ironing board (and a clean cloth for pressing)
Make It!
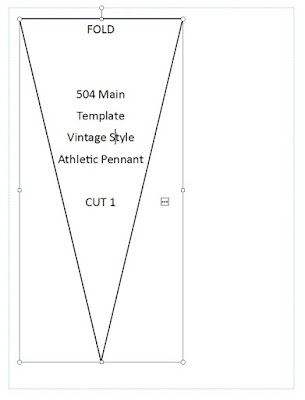
- Download the pennant template.
- Fold the felt so that the (short straight) side of the pennant lies on the fold. If you are using the small sheets, there will be no fold and you will need 2 pennant cut outs.
- Line the flat side of the pennant on the fold and trace. Trace as many as you need.
- HINT: when you are done tracing, and if you are careful, draw a straight line across the tips. Cut that line first and then proceed to cut out the pennants. You will not only get your pennants but you will also get triangle to make a sporting bunting too!
- Using the software from the craft cutter, select a font and type the name of your team. (bear with me here, I am no expert and I am sure there is a better way to do this, but this is what I did).
- I wanted my team name to follow the shape of the pennant (Bigger in the front and smaller in the end)...if you are fine with your team name being all the same size, skip ahead.
This is how I got my team name to "flare out" (non-technical term):
- I typed the biggest font size I could so that my "S" was still on the pennant. Since the "S" was my smallest letter, that is where I needed to begin.
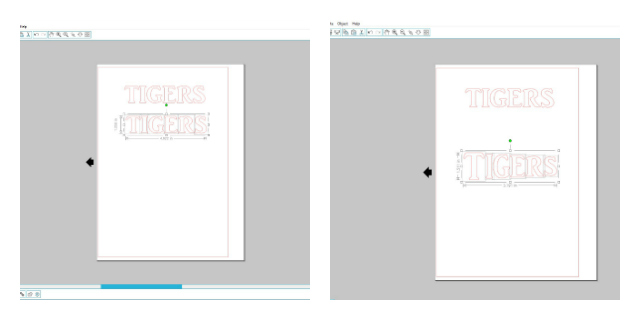
- Click on the word, right click, Ungroup. Now each letter is individual. (below, LEFT PHOTO)
- Click on each letter and size it up to make it bigger. I began with the R (since s is my smallest letter). I made the R about 1/4" taller, the the E, then the G, etc. It takes some playing around and eyeballing it to get it right. (below, RIGHT PHOTO)
- Now you have a word with letters of different sizes (biggest letter is the first letter of the word T), all lined up along the bottom of the word.
- Click on all of the letters, then Object--Align--Align Middle. This will line up each letter along a center point (the center of the letter).
- Right click and Group them again. (below PHOTO)
- DO NOT FORGET TO DO THIS: MIRROR YOUR IMAGE! YOu cut on the back side of the heat transfer material
- Object -- Mirror --Mirror Horizontal
Let's CUT!
- Set or recheck your page settings. My Heat Transfer was only 9" wide
- Position the material on your page layout window and in your machine (be sure to over the rollers if necessary) I was making multiples, so I cut quite a few (and could fit another down the side here too).
- Select "No Mat" (Design Page Window)
- Cut Settings: Blade =2. Speed =8, Thickness =14 (your machine may prefer different settings, always try a test cut). These are not the settings recommended on in the software, but this is what works for me.
- Move your roller bars to accommodate the size of your paper (if necessary), with the PLASTIC side DOWN, load the paper (without a mat) into the machine.
- Hit cut ( and if you are like me, cross your fingers).
- Carefully cut your individual words apart.
- Separate the plastic and the material and pull the excess material off, leaving your design (the letters) on the plastic.
- Heat the iron to cotton - but be careful, if you iron the felt without a pressing cloth, you may burn it.
- Fold the pennant in half and place your word as you prefer it on the pennant. It should stay, as the plastic has a slight stickiness to it.
- Put the pressing cloth over it and press hard (slightly moving) with the iron for 30 seconds. READ your package instructions.
- Remove the cloth and while warm, peel off the plastic carefully.
For Felt with a FOLD
- In the center crease zig zag hot glue and place a dowel in the center, leaving about 3/8" at the top.
- Fold the pennant over, matching at the points and press the area that was hot glued to the stick.
- Open the pennant up and run a thin line of hot glue around the edges and down the center, press the two sides together.
IF YOU ARE USING TWO PIECES OF FELT...TRY THIS (see below(:
- Lay the two sides as a mirror image.
- Apply a thin line of hot glue down the short straight side of one piece.
- Place the other piece on top (basically making a seam using glue)
- Then, finish the pennant as shown above, by placing the dowel in the crease/seam/fold and attaching the two pieces with glue.
These little pennants are so fun - just imagine how fabulous the crowd would look cheering on the team with these!
And of course you can add details like a fun pom pom on the tip!
They are really easy to make...just pick your method of adding the lettering and get moving!
Go Team!
Here are a couple more of my Heat Transfer Vinyl projects
Horse Tote Bag in Gold adorned with DIY yarn tassels!
Or let's Hit the Road with a Route 66 Tote Bag


These are so awesome. I love how easy they are to make, fun project and great for a birthday party too. You should link these project up at a link party I am hosting, Holly. I hope to see you there. Have a great week. http://diy180site.blogspot.com/2016/09/dishing-it-and-digging-it-link-party-115.html
ReplyDeleteThose are great! I lived in texarkana for a few years and I know Texans are serious about their sports, so you are definitely on the right track!
ReplyDeleteThanks so much for linking up with us at the DI & DI Link party, I hope you found some new friends. We loved having you!