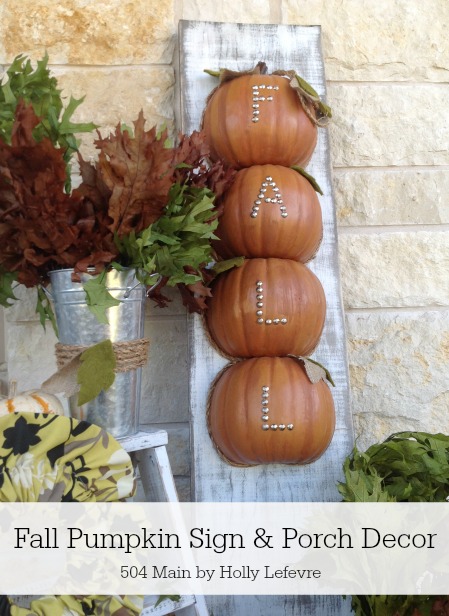
Every.single.year. I say I am going to really decorate for Fall - really decorate...and I usually just fill the porch with pumpkins....BUT finally, I really do have a beautiful Fall porch! Partnering with Oriental Trading I created this pretty pumpkin sign and Fall display. I wanted a look that would "work" throughout Fall into Thanksgiving (until the Christmas decorations come out!), and this look will do just that.
Can you believe I have never used craft or foam pumpkins? Well this was my first time. I spied the foam pumpkins on Oriental Trading and then I saw the galvanized buckets and my mind started swirling with ideas (too many ideas actually). I originally thought about creating something Halloweeny, but decided to make this pretty Fall sign and display instead!
Here's how to make it yourself.
Supplies
- 2 - Foam Pumpkins (This gives you 4 halves)
- 1 - 4 foot x 12" pine board (My was stained a dark wood color)
- Styrofoam glue and/or hot glue. (if you want to know what other types of glue are good for foam products, try looking it up on This to That
- Knife (I may have used my serrated knife from the kitchen)
- Paint: white for the board and oranges for the pumpkins (optional), possibly brown to tough up the stem.
- Paintbrushes
- Sanding block/sander
- Jute Cording
- Galvanized Tall Pots
- Furniture Nails - I used silver, but you can use any color.
- Optional: burlap and heavy felt (for leaves)
The Board
- Cut to length (if necessary) (48"-50")
- Sand edges of board.
- Stain it, let dry. (I used Jacobean)
- Paint all over in white chalk paint.
- Let dry, sand it, wipe with tack cloth.
Pumpkins
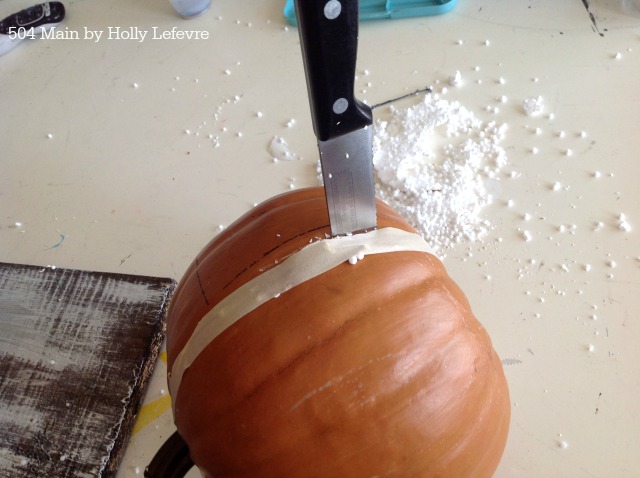
- This can get messy! Layout newspaper, a drop cloth, anything to catch the foam pieces.
- I marked my cut line with masking tape.
- Use a sharp knife and BE CAREFUL. Cut each pumpkin in half. I used a plunging motion and then wiggle it back and forth, removed the knife, plunged again, etc.
- On one half (of one pumpkin) make sure to leave the stem attached.
- Cut both pumpkins in half.
- It is easiest to do the Letters now. I used a simple font (Arial in all capitals), spell it out on the computer so that the letters are about 3" high and print. Then transfer the letters to the pumpkin with by using the furniture nails to poke holes through the paper, remove the paper and then replace the furniture nails.
Add Additional Detail (optional)
- Honestly - these are some excellent looking pumpkins...they have shades of orange and look pretty realistic. I did decide to add some darker orange in the creases but it is totally OPTIONAL.
- Cut some leaves out of burlap and felt or any fabric or paper you have on hand. I used about 8 felt and 6 burlap. I just cut leaf shapes - nothing fancy.
Put it Together
- Line up the pumpkin halves on the board. My first pumpkin is about 6" from the top (this leaves a good amount on the bottom for additional decor and to make sure the weather, etc. does not ruin your pumpkins). The remaining pumpkins fall in line nicely below the top one. Just be sure to keep them centered on the board.
- Once you have your placement, glue the pumpkin down. I used a glue made for foam. Place a line of glue around the outside edges and secure to the board. Let dry overnight. In the past I have used regular white glue and hot glue (on low setting).
- After I glued my pumpkins down, I realized my edges were not as clean as I like. I used the jute cording and a think line of hot glue to outline my pumpkins. It cleaned up the edges and added another interesting element. You can use fabric trim or ribbon too!
- Finally I layered my leaves together and glued them onto the pumpkin and in between the pumpkins. As a final detail, I cut two short lengths of rope, glued them behind the stem and let them hang down like a vine.
Complete the Look
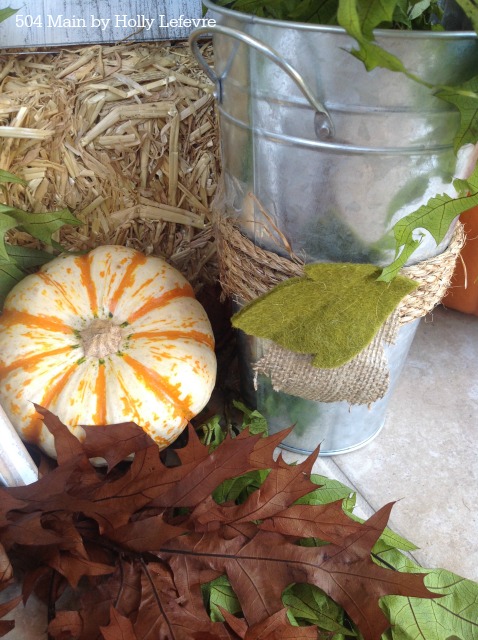
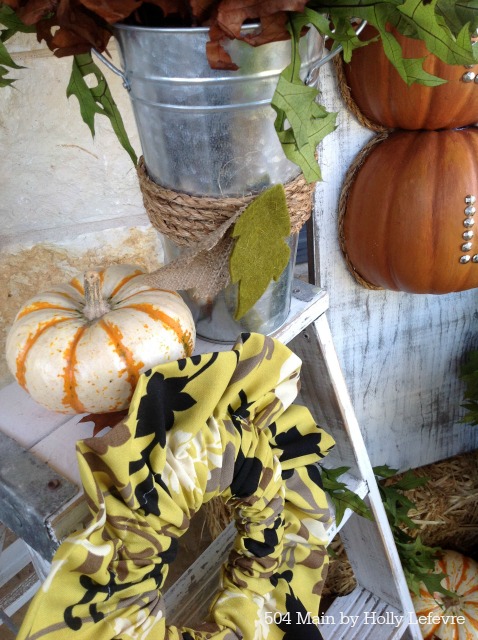
- Wrap some rope cording around the center of the Galvanized Buckets. You can secure with glue, tie it off, or because I plan on using these fabulous buckets as often as possible, I secured the back with clear packing tape (no one can see the back!).
- Add a few more leaves to the front and you have added the perfect compliment to the sign and the decor.
- I purchased the bunches of leaves at the grocery store, and simply filled the buckets with them. A few small pumpkins, a fabric wreath, and an old step ladder and the look is complete
So...I am totally in LOVE with this project. I love seeing my porch look festive and pulled together...who knows this might become a habit!
I have shopped with Oriental Trading for years, but mostly for party supplies. I was...am super excited to discover how many home decor products are available along with Halloween decor and Halloween costumes. Be sure to check them out for your decorating, Halloween and party needs!
How do you decorate your Fall porch?


No comments:
Post a Comment
Thanks for stopping by and joining the conversation! I sure hope you come back for more!