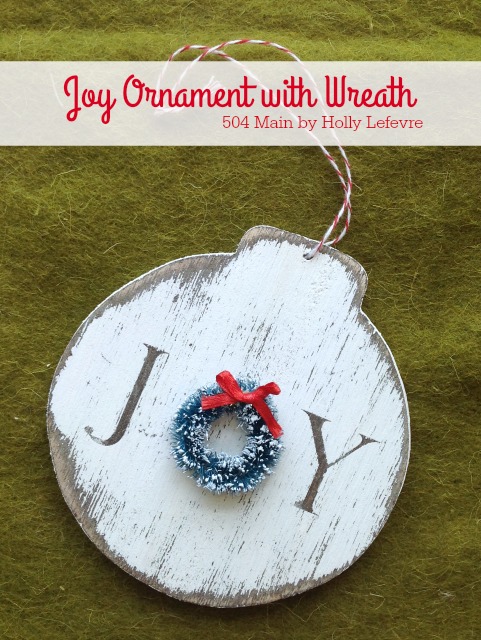
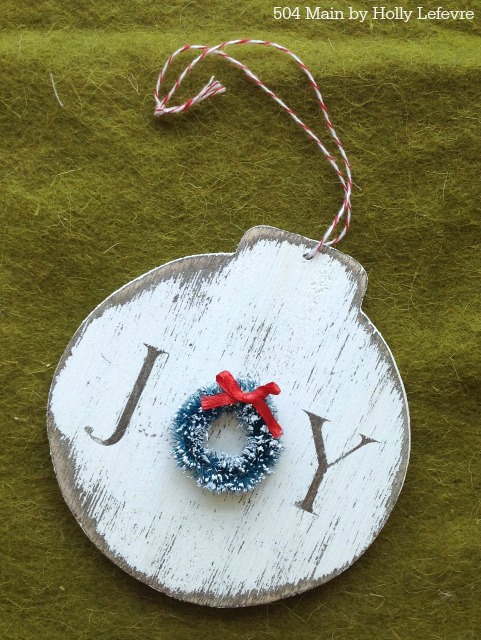
For this first ornament of the season, I was super inspired by my Farmhouse Home Sign and my apparent (and new found) love of replacing "O's" with other things (hearts, wreaths anything!). I tend to stick to pretty traditional colors and decor - at least until I get my pink tree (a girl can hope)! So here's how to make these JOY Ornaments...and you can make them in any color you'd like! And they are so EASY!
Before we get started....Be sure to check out the other 31 bloggers sharing their handmade ornaments too! (there's a link to them all at the bottom!)
Supplies
- Wood Ornaments. I purchased mine at Michaels. They are part of the Handmade Holidays line. There are quite a few shapes to choose from. About $1.99 each (but there's usually a sale or a coupon available!)
- Miniature wreaths (also from Michaels), Merry Minis (6/$2.99)
- Paint: I used Americana Decor Chalky Finish Paint in Everlasting (because I use it all.the.time!). I also used Americana Multi Surface paint in Lipstick
- Paintbrushes
- Sandpaper/sanding block/electric sander
- Hot glue/glue gun, E6000, or regular glue
- Ribbon/twine/yarn/wire (your choice for hanging). The existing holes on these ornaments are small so 1/8 ribbon or bakers twine - something thin will work best. The ornaments come with a twine hanger...but I got paint on mine.
- The word JOY: I used a craft cutter and made a stencil with vinyl and transfer tape.
- Here are some options if you do not have a craft cutter:
- You can download a very simple sheet with JOY on it here and use carbon paper to transfer the words.
- Pre-made/store bought stencils are also a good option.
- You can read more about transferring letters to wood on this Home sign post.
- Optional: wood stain. I like to stain my unfinished wood because I like the contrast in color.
Make it!
- (Optional) Cut the twine off the ornament or tape over it so it does not get painted.
- Stain your bare ornaments. Let dry.
- I use the stencil I made in my Silhouette Design Studio. My font is Perpetua Titling MT in 121 pt. with character spacing at 138.
- You can also freehand JOY - just make sure to use your mini wreath to determine the placement.
- See above in "Supplies" for more ideas.
- Whatever option you choose to use, JUST BE SURE to leave a wider space between the J and Y, about 2" (so the wreath fits).
- If you want your letters to be wood (like one of my examples), use the letter stencil or the stick on letters and place the J and Y on the ornament, centered (with 2" between the two letters).
- Press the letters down hard, so they really stick to the board.
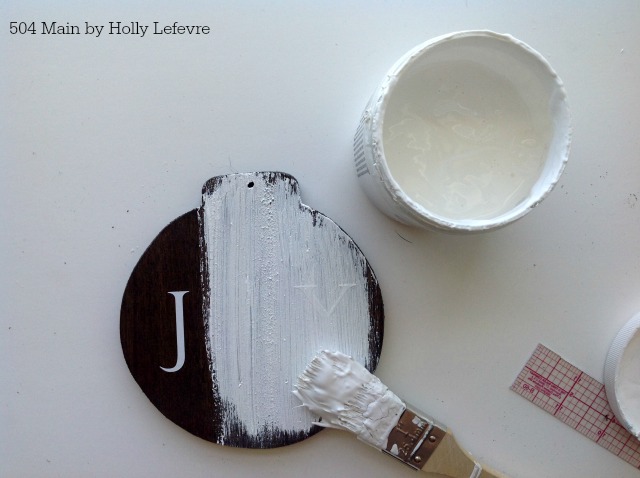
- Paint the ornament white (carefully go over the letters). Let dry. Remove the sticky letters when dry.
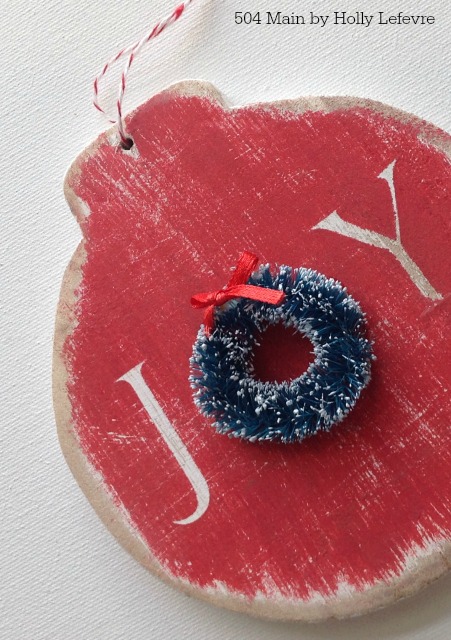
- How to use the above method if you want 2 colors: Paint your ornament the color you want your letters (white), let it dry completely. Then add the letters and paint over it with your color of choice (red). Let dry and remove the stickers.
- After the ornaments are dry...
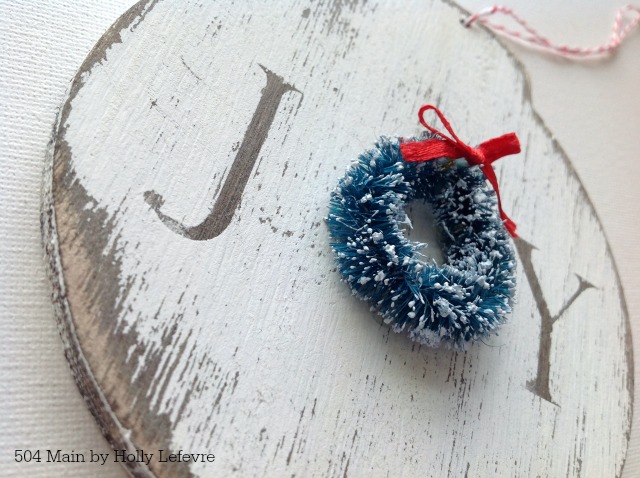
- Sand the edges and all over the ornament.
- Wipe clean with tack cloth (sometimes I wax them with the Creme wax for Chalky Paint) - You must wipe the ornaments clean so that the glue will stick.
- Glue the wreath to the center of the letters - where the O should be! Let dry.
- Add a ribbon, twine or wire to hang the ornament...and you are all done!)
I definitely have a few more ornaments to show you over the next few weeks, but for now, you should head over to visit these other creative bloggers and their ornaments!
Here are all 31 Bloggers in order of their appearance:
Day 1 - The Silly Pearl :: Day 2 -Yesterday on Tuesday
Day 3 - Cupcakes and Crinoline :: Day 4 - An Extraordinary Day
Day 5 - Knick of Time :: Day 6 - Pet Scribbles :: Day 7 - Simply Kelly Designs
Day 8 - Town and Country Living :: Day 9 - Petticoat JUNKtion
Day 10 - The Everyday Home :: Day 11 - Up on Tippy Toes
Day 12 - Remodelando la Casa :: Day 13 - DIY 180 :: Day 14 - 504 Main
Day 15 - Sum of their Stories :: Day 16 - At Home with Jemma
Day 17 - The Kim Six Fix :: Day 18 - Shabby Art Boutique
Day 19 - Morena's Corner :: Day 20 - My Uncommon Slice of Suburbia
Day 21 - Our Southern Home :: Day 22 - Domestically Speaking
Day 23 - The Crafting Nook :: Day 24 - Sweet Pea
Day 25 - Dukes and Duchesses :: Day 26 - Heathered Nest
Day 27 - Lovely Etc. Day 28 - Stone Gable Blog :: Day 29 - Mod Podge Rocks
Day 30 - Running with a Glue Gun :: Day 31 - All Things Heart and Home
Be sure to visit Handmade Christmas Ornaments on Pinterest and see the linky below to be amazed by everyone's creations!




Holly,
ReplyDeleteThese are awesome and I love the distress look you did to them. I am going to give these a go.
Beautiful! Your ornaments are going to look so pretty on your tree.
ReplyDeleteI love the traditional colours you have here and the distressed looks is just perfect.
ReplyDelete(could you not have your own special small pink tree tucked in a corner somewhere in the house though?)
These are adorable and so easy- pinned them!
ReplyDeleteI love the distressed look and how you replaced the O with a wreath!
ReplyDeleteThey look lovely! Perfect distressed look.
ReplyDeleteSo adorable, Holly!
ReplyDeleteSo pretty and simple-what a wonderful combination!
ReplyDeleteJemma
Love these Holly. Anything distressed looks good in my shabby house, so putting these on my To-Do list.
ReplyDeleteThese are so cute, Holly. I think I'm going to make them for my smaller Christmas tree!
ReplyDeleteLove the distressed look on these ornaments!!
ReplyDeleteAdorably cute... that mini wreath is too cute!
ReplyDeleteOh my gosh I adore these, super cute!
ReplyDeleteOMG these JOY ornaments are perfect! LOVE!!
ReplyDeleteThese are absolutely beautiful, Holly! I love the distressed look.
ReplyDeleteThese are so adorable! I absolutely love the little wreaths - I think I am right there with you when it comes to replacing Os with objects. You just can't go wrong with it!
ReplyDelete