I really needed some thing to add some sparkle - glitz and flair to our Christmas decor, but obviously there's not a lot of time left before the big day. BUT there is time for a 15 minute wreath!I decide to make this delightfully obnoxious, sparkly wreath. I bought a ton of tinsel garland at a thrift shop and was not quite sure what to do with it and suddenly it hit me - it need to be a wreath and have a big ole plaid bow...because I love mixing things that do not normally go together...and ya know what...I more than LOVE it...and I may use this as next years Christmas theme.
Thursday, December 8, 2016
This shop has been compensated by Collective Bias, Inc. and its advertiser. All opinions are mine alone. #FlavorSplash #CollectiveBias
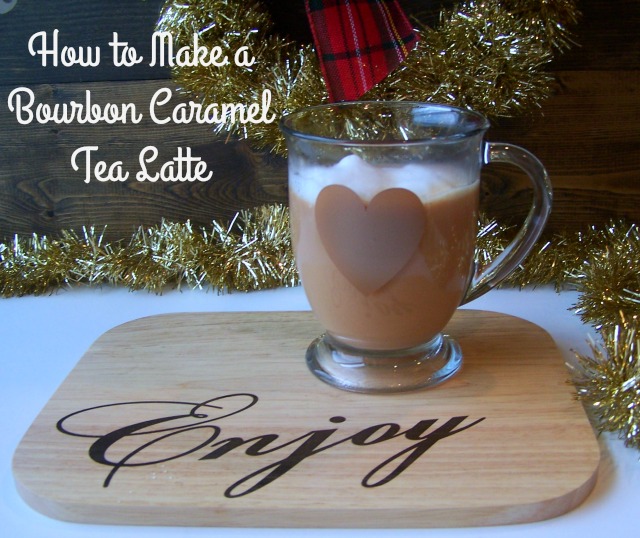
I have never, ever made it a secret that I L-O-V-E coffee. For a very long time I was strictly a mocha drinker...but my tastes have changed...and I have discovered a whole new world of unique and amazing tea beverages! My hubby has been a BIG tea drinker for awhile and I have always enjoyed a cup...but now, I am all about creating new flavor combinations for my tea! Right now, I am loving the Tea Latte and have whipped up a hot beverage using Torani Bourbon Caramel Syrup.
I have never, ever made it a secret that I L-O-V-E coffee. For a very long time I was strictly a mocha drinker...but my tastes have changed...and I have discovered a whole new world of unique and amazing tea beverages! My hubby has been a BIG tea drinker for awhile and I have always enjoyed a cup...but now, I am all about creating new flavor combinations for my tea! Right now, I am loving the Tea Latte and have whipped up a hot beverage using Torani Bourbon Caramel Syrup.
Labels:
#flavorsplash,
beverage,
bourbon caramel,
Christmas Recipes,
coffeehouse,
flavoring,
hot beverage,
latte,
printable,
recipe,
recipe card,
recipes,
tea,
tea latte,
torani,
torani syrup
Saturday, December 3, 2016
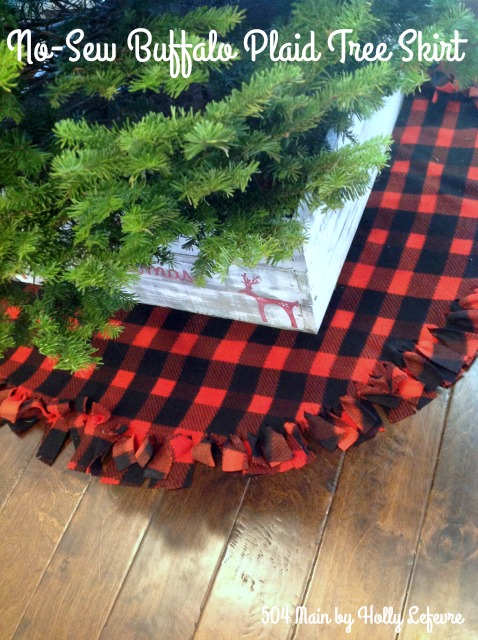
One of the easiest ways to change up the look of a Christmas tree is with a tree skirt. I have used tablecloths, blankets, ruffles, and yards of fabric. This year I wanted a new look...again. When I made my rustic scrap wood ornaments, I was inspired to try a more rough and rustic approach to my Christmas tree skirt and overall look. Well, and I just happen to LOVE buffalo plaid - any plaid actually. I surely wish I still had my double breasted royal blue and black buffalo plaid coat from Contempo Casuals!
Tuesday, November 22, 2016
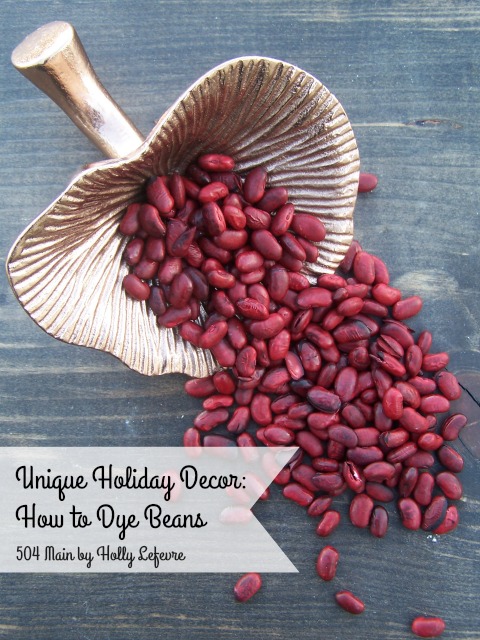
Once upon a time I dyed beans...and they looked so cool! It truly is one of my favorite DIY's every. As the beans absorbed the dye they puffed out, expanded and really turned out to look interesting and unusual. Well, this year I decided to try it again, using the color Marsala. The deep rich tones will also work well with my Christmas decor (bonus!). So go grab some beans and some dye and let's do this!
Friday, November 18, 2016
This sop has been compensated by Collective Bias, Inc. and its advertiser. All opinions are mine alone. #thetalkofthetable #CollectiveBias
The following content is intended for readers who are 21 and older.
Friday, October 21, 2016
You know what we love? Pound cake with little surprises baked inside! Yep - cute little edible finds, like hearts and shamrocks, can hide right inside your pound cake. It is fun and easy to do and the kiddos are always amazed - quite a few adults are impressed too. So, I decided to try my hand a quick Halloween version of the surprise inside pound cake. This time I used bats!
Tuesday, October 18, 2016
Labels:
#madewithmichaels,
15 minute wreath,
black,
black and white,
craft,
create,
halloween,
Halloween decor,
holidays,
maker,
Michaels,
projects,
ribbon wreath,
straw wreath,
witch,
wreath
Friday, October 14, 2016
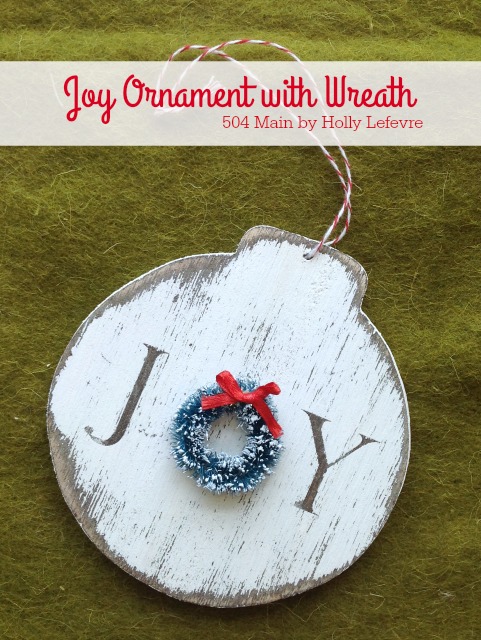
You know what time it is? (no silly, its not hammer time - did I just give away my age?). It's time to start making Handmade Christmas Ornaments My absolute most favorite thing to do during the holidays is make ornaments with my kids. Some times they are very cool, clever and gorgeous and we keep them forever...and sometimes we just color or write on card stock - it depends on how the day is going...seriously this happens. Last year I made a ton of Wood Scrap Ornaments (even some ornaments with my favorite photos!) and this year I have some sweet wood JOY ornaments as part of 31 Days of Handmade Christmas Ornaments series.
Monday, October 10, 2016
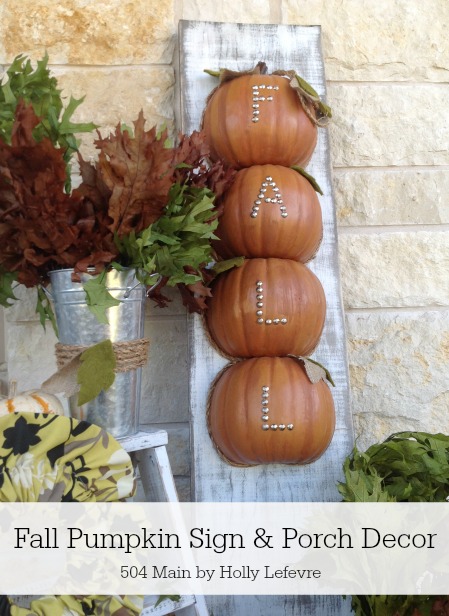
Every.single.year. I say I am going to really decorate for Fall - really decorate...and I usually just fill the porch with pumpkins....BUT finally, I really do have a beautiful Fall porch! Partnering with Oriental Trading I created this pretty pumpkin sign and Fall display. I wanted a look that would "work" throughout Fall into Thanksgiving (until the Christmas decorations come out!), and this look will do just that.
Labels:
#orientaltradingcompany,
craft,
create,
Fall,
Fall decor,
front porch,
holidays,
home,
leaves,
make,
oriental trading company,
porch,
porch decor,
projects,
pumpkins,
signs,
wood sign
Thursday, September 22, 2016
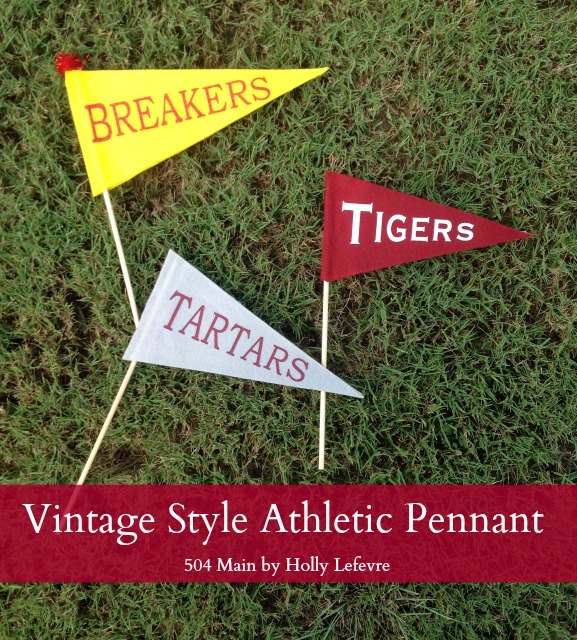
It's Homecoming time here in Texas (well, I guess all across the U.S. for that matter). Homecoming in Texas is a little different than Homecoming where I grew up in California. We had a football game and a semi-formal dance...BUT, here there are mums - do you know what I am talking about? If not, I just really cannot explain it fully...just read "12 Things Non-Texans Need To Know About Homecoming Mums". Then there are parades and of course the football game...because...it is TEXAS! Because I am trying to fit in here, we are going to the parade and I made these little pennants that sort of evoke a vintage feel to wave around like maniacs during the parade (because we will not be wearing mums and looking like maniacs, just kidding, I actually like the idea of mums).
Sunday, September 11, 2016
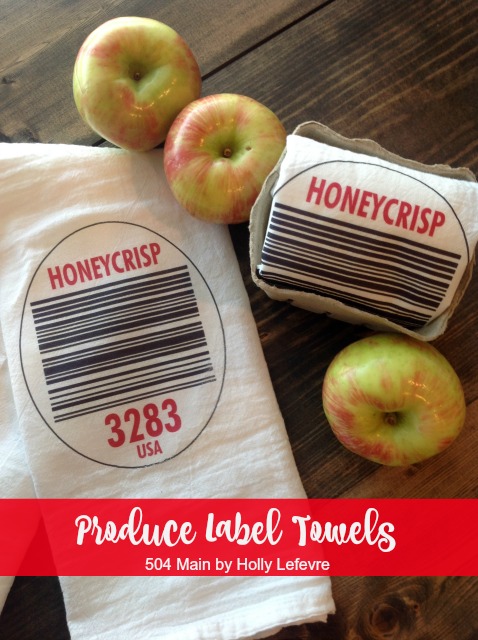
I have a serious love affair with kitchen towels. I find it one of the easiest ways to show some personality in my kitchen. I have quite a large collection of California themed towels, and a ton of towels I have made, like the sweet vintage mason jar towel. Well, it is time to make some more towels...I thought about fruit...then vintage labels...then how much we loved going apple picking in the Fall...then POOF - it hit me, how about some produce label towels (and, I totally know that when you pick apple off the tree they do not come with labels...ok?). My kids thought I was being weird and then realized this was pretty appropriate because, while I do wash the fruit for their lunches...its early...I am NOT a morning person, and I always leave that produce sticker on.
Labels:
#madewithmichaels,
Avery,
craft,
create,
flour sack towel,
gift,
graphics,
heat transfer,
home,
image transfer,
kitchen,
kitchen towel,
printable,
produce,
produce label,
produce stickers,
projects
Wednesday, May 4, 2016
Many (many) years ago, I was a young girl just starting to work in the Los Angeles garment industry. I worked with real toads, but I also worked with some people who touched my life forever. Some with friendship and some with food. In our design room we had two very sweet ladies sewing for us. One day they decided to throw a party for us and brought the most amazing Mexican food...and this cake, a Tres Leches Cake which is still quite possibly, pretty much the best thing I have ever eaten.
Wednesday, April 27, 2016
Labels:
chalk paint,
craft,
decoart,
DIY,
farmhouse,
farmhouse style,
fixer upper,
home,
home decor,
home sign,
home sign with wreath,
original home sign,
paint,
projects,
rustic decor,
wood,
wood sign,
wreath,
wreath as O
Monday, April 25, 2016
I try to deny it all the time, but I am wreath obsessed. My latest wreath crush is on miniature versions of this home decor favorite. I have made versions to use on signs and mostly to add a little touch of Spring greenery around the house. They are great to use on mantles, in vignettes, on tablescapes - pretty much anywhere. And they are inexpensive and simple to make!
Monday, April 4, 2016
I drive A LOT. I drive A LOT on scary-fast Texas highways. I
see people speeding down the lanes on their phones, eating lunch, putting on makeup, taking videos and photos - you
name it. It is unbelievable what people do behind the wheel of a car! I take driving very seriously. Not
only am I trying to teach a teenager road
safety, but no less than 5 times in the last year if I would not have
been acutely aware while driving, I would have been in major accidents. Recently I partnered with the Drop Stop to show you how easy it is to install this simple preventative tool to help stop distracted driving and stay safe.
Wednesday, March 30, 2016
When I was a kid and we went out to dinner, I always asked my mom if I could have french fries, mashed potatoes and hash browns for dinner - all together and only those three things. She said no...always. But clearly I have always liked potatoes! And I still do! I am however a little more balanced in my selections than I used to be, so I limit myself to one potato dish per meal. My husband actually created these crispy, tasty potatoes and my entire family cannot get enough of them.
Monday, March 21, 2016
I admit it...I am a bit of a banner or garland or bunting - whatever you want to call it! - addict. I really find it is one of the easiest ways to decorate and redecorate. And I L-O-V-E to layer these banners. Before I made my Watercolor and Pastel Bunny Banner, I made these cute (at least I think so) pipe cleaner bunnies. Well, I'll fess up, I made them a long time ago and I have always loved them...but never posted them because I could not get a photo to do them justice. I adore them for the fuzzy simplicity! And...don't they look cute paired with the other bunny banner? I think their fuzzy, fluffiness and single color compliments the colorful bunny banner - it makes the colors pop!
Wednesday, March 16, 2016
I stole - I mean, I am borrowing this recipe from my friend, because it is too good not to share. In my defense, at this point I have messed with it enough to call it my own...sort of. Many, many years ago she made this for Easter brunch and it was delicious. I have made it every year since because: 1 - it is delicious and 2 - It is EASY! In my book those make anything a winner. So, I will tell ya, this best part about this is that you make it the night before, so that in the morning all you have to do it put it in the oven!
Tuesday, March 8, 2016
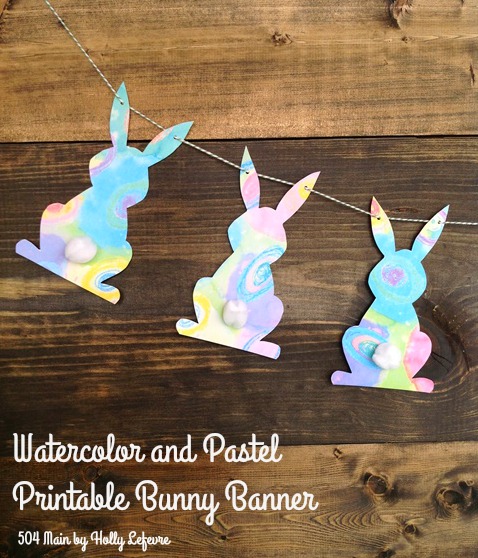
A couple years ago I created a sweet little bunny banner. It was super easy to make and apparently people like that - it is one of my most popular holiday projects! Well, here's a modern update of the popular bunny banner. This time it's a printable and in gorgeous watercolor patterns. Just print, cut and string it up!
Monday, March 7, 2016
I like to make my daughter a special t-shirt for every holiday. I have to fit them all in now, because she is almost "Over it." Last year, I made a painted striped bunny T-Shirt, and if I do say so myself thought it was pretty dang cute! This year, I wanted to do it again, but thought how can I make it different and even simpler for you to make one yourself. So, I pulled out some old watercolor originals of mine added it to my bunny template from my bunny banner and voila...its almost done for you!
Labels:
bunny,
craft,
create,
easter,
family,
holidays,
inkjet,
kids,
kids clothing,
printable,
project,
Spring,
t-shirt,
t-shirt transfer,
watercolor
Wednesday, March 2, 2016
My creative groove has been hiding in a deep dark crevice for awhile now. I have been in Austin, Texas for almost 2 years now and am finally exploring the AMAZING options inn this city. Recently I cam across a small business called The Paper + Craft Pantry and was super excited to see their line up of DIY workshops. I have tried screen printing before and really loved it, but was a wee-teeny-tiny bit intimidated by some of the process...so when I saw there was a Screen Printing workshop...I signed up!
Friday, February 26, 2016
On a whim, a new friend asked me if I could make her a sign on a pallet. "Sure! I can do that." She had a vision but was also willing to let me do my thing. Really, in the end all she specified was the wording "Make Jesus Famous." This was going to be a statement piece for sure.
Labels:
age wood,
artwork,
chalk paint,
DecoArt paint,
distress paint,
DIY,
minwax,
paint,
pine boards,
projects,
Silhouette Cameo,
silhouette cutting machine,
statement piece,
stencil,
wood sign,
wood stain
Tuesday, February 23, 2016
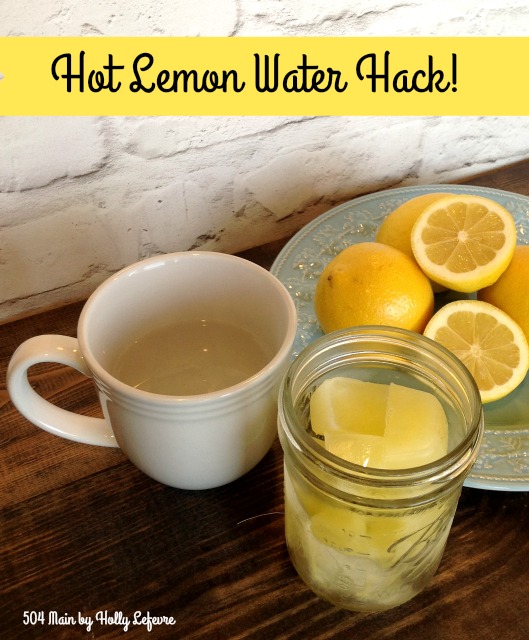
Every day I try (really hard) to be healthier than the day before. There are many ideas I have implemented over the years. Some have stuck, some have gone bye-bye. One that has endured is drinking a cup of hot lemon water in the morning (in fact I drink it a couple times a day).
Friday, February 19, 2016
Scones! Scones! Scones! You are chanting that, right? A favorite breakfast treat is scones. I admit I usually do not make them from scratch, but this was a special occasion and I wanted to try making some with some of my family's favorite flavors - cherries, chocolate and almonds! Man oh man they baked up just perfect and tasted even better. These scones would be amazing with tea, coffee or just because and best yet, you can play with the ingredients to suit your tastes!
Tuesday, February 16, 2016
It is hard to believe, but cherry pie is about to surpass chocolate as the favorite dessert in our house. In fact, even at Christmas - holiday of pumpkins and pecans - my daughter asked "Why cant we have cherry pie...its red and festive?" Can't argue with that logic, right? Well, we celebrated a birthday this past weekend and guess what I made...cherry pie. It is so good and I thought I'd share my sweet shortcut to amazing cherry pie!
Labels:
bake,
cherry,
cherry pie,
dessert,
fruit,
fruit pie,
pie,
pie crust,
pilsbury,
presidents day,
recipe,
recipes,
semi-homemade,
shortcut
Tuesday, February 9, 2016
Cereal is a staple in our house. No seriously, we could eat it for breakfast, lunch, and dinner! We also love snacks...so what better way to make us (and hopefully you happy) than by combining cereal and snack bars! One of my kids favorite cereals is Special K Red Berries, so I decided to turn that into a yummy cereal bar.
Saturday, February 6, 2016
I classify these printable Valentines "oops-I-forgot-it-was-Valentines day-easy-peasy-printable -bookmarks." For some reason I am overcome with Valentines this year (which is a complete 180 from previous years - my whole life even!). I have been dreaming about kiddo Valentines. Now, all designs for Valentines MUST be 8 year old approved...and apparently she does not share my sense of humor...BUT this one passed! And it has googly eyes! BONUS!
This printable Valentine has a lot to like:
SUPPLIES
Cardstock (white)
Printer
Scissors
Elmer's glue
Template (find it here!)
Googly/Wiggly eyes (I used basic eyes, but there are colored one, ones with eyelashes - be creative!)
Optional:
Hole punch
Ribbon or thread
Make it!
Print out the template on cardstock (there are four per sheet)
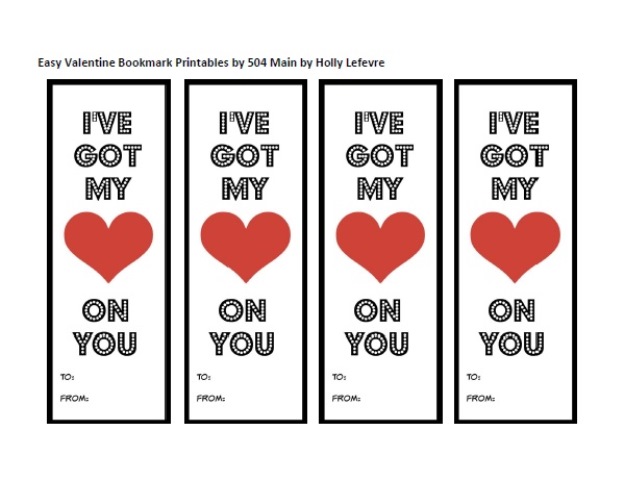
Want some more ideas...check out my JUST DUCKY printable Valentines too!

This post is written and created at 504 Main by Holly Lefevre
This printable Valentine has a lot to like:
- It is pretty cheap.
- Supplies are easy to find
- And it is quick to make!
SUPPLIES
Cardstock (white)
Printer
Scissors
Elmer's glue
Template (find it here!)
Googly/Wiggly eyes (I used basic eyes, but there are colored one, ones with eyelashes - be creative!)
Optional:
Hole punch
Ribbon or thread
Make it!
Print out the template on cardstock (there are four per sheet)

- Cut them out
- OPTIONAL: punch hole in one corner and thread 16" lengths of ribbon through
- Place a small dot of glue on each googly eye.
- Place the eyes on the heart.
- All done. That took, what, 5 minutes - so easy and so stinkin' cute!
Want some more ideas...check out my JUST DUCKY printable Valentines too!
Happy (EASY) Valentines Crafting!
Labels:
#ValentinesDay,
bookmark,
crafts,
DIY,
easy crafts,
family,
googly eyes,
kids,
kids activities,
My projects,
no candy valentine,
printable,
projects,
valentines,
valentines craft,
valentines party
Thursday, February 4, 2016
In my house we are creatures of habit. So, every year as hearts go up around school and stores, cupid makes his appearance, and everything starts turning pink, my daughter begins to ask for the "Special Valentines Bread." I am always happy to oblige...I mean this pound cake with a surprise heart is so darn cute and always surprises not only the kiddos but adults too!
Tuesday, February 2, 2016
I love wood signs. It's one of my favorite ways to decorate and express myself. I am always trying to come up with new ideas and new ways to incorporate all of my loves -textiles and fibers, wood, power tools, paint, etc. - into crafts and projects. This wood cross-stitch LOVE sign for Valentines Day (or any day), does just that and is so dang cute (if I do say so myself)!
Wednesday, January 27, 2016
Monday, January 25, 2016
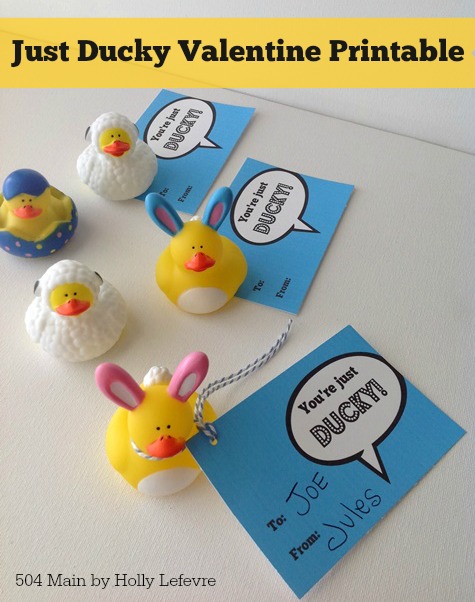
Do you remember those adorable Just Ducky Valentines from last year...well, guess what? The rubber duck OBSESSION continues!And it doesn't hurt that these ducky valentines were a big HIT last year. This year, my daughter wants to do them again (There is only one kiddo in her class from last year, so it is practically a new idea for everyone else). However, this year, I designed some CUTIE-PATOOTIE printable tags to go with them!
Thursday, January 7, 2016
We don't have snow here, even though my daughter wishes for it every night (chances are good it is not going to happen). It is cold but not that cold, but I thought with a few polar bear and Arctic inspired crafts we could create our own winter wonderland and appease her need for cold and snow.
My daughter has been super excited to go see the movie Norm of the North. Of course polar bears and all those adorable arctic creatures have something to do with it. I created -with close supervision and approval from my daughter - this CUTE tote bag inspired by Norm and I also entered it on the #NormOfTheNorthSweeps (Instagram Sweeps).
Supplies
Make It
Look at that cute face!
We loved the tote bag so much we made a sweatshirt too!It is exactly the same process, you just put it on a sweatshirt!
Who can resist a polar bear???? There are a ton of fantastic polar bear and Arctic inspired crafts on on the Norm of the North Pinterest Board.
Want a chance to win a $500 gift card or one of 5 Norm of the North Swag Bags in the #NormoftheNorthSweeps...visit the rules and upload your creation to Instagram

This post is written and created at 504 Main by Holly Lefevre
disclosure: I was asked to participate in the #NormoftheNorth Instagram Sweeps by Megan Media. This craft was created by me for that contest. No blog post was required.
My daughter has been super excited to go see the movie Norm of the North. Of course polar bears and all those adorable arctic creatures have something to do with it. I created -with close supervision and approval from my daughter - this CUTE tote bag inspired by Norm and I also entered it on the #NormOfTheNorthSweeps (Instagram Sweeps).
Supplies
- Polar Bear template (download it Bear 1 and Bear 2!)
- Blank white (or colored) tote bag. These are available at local craft stores and mass retail merchandisers.
- IMPROVISE:
- Buy a colored tote instead of what to skip the dyeing.
- This is also adorable on a sweatshirt! See photo below
- Fabric Dye. I chose to dye my bags and used a Turquoise dye - it seemed arctic and icy!
- 2 black 5/8" buttons
- White Sherpa fabric (I bought this at Michaels in the sewing area)
- White felt
- Black felt
- IMPROVISE:
- To cut costs or accumulating more supplies, white felt can be used in lieu of white sherpa fabric
- Heat N Bond Ultra (Iron, ironing board, clean white cloth/towel for pressing).
- You can try fabric glue, but I really LOVE this stuff Hot glue gun or fabric glue (for eyes)
- Scissors
Make It
- Dye your tote bag according to package directions (followed by washing an drying)
- OR
- If you are not dyeing the tote, wash and dry it before proceeding.
- READ and USE package directions for applying Heat N Bond.
- Apply heat and bond to the white sherpa fabric (make sure the face fits on the piece of fabric), the white felt, and black felt.
- Once the Heat N Bond is applied, flip the fabric over. You will trace your templates onto the backing of the Heat N Bond.
- Cut 1 face in sherpa
- Cut 1 snout in felt
- Cut 2 ears and one nose in black.
- NOTE: The sherpa will shed a bit around the cut edges.
- Remove the backing from the nose and iron it onto the snout. Use a blank/clean cloth for pressing. Trim if necessary.
- Remove the backing from the snout and iron it onto the face. Use a blank/clean cloth for pressing.
- Remove the backing from the ears and iron it onto the ears on the face. Use a blank/clean cloth for pressing.
- Remove the backing from the polar bear face.
- Place the (almost) completed face onto the tote bag, into position. Using the clean cloth, press the face onto the tote bag. (see photo above for approximate placement)
- Use hot glue to apply the buttons/eyes onto the polar bear.
Look at that cute face!
We loved the tote bag so much we made a sweatshirt too!It is exactly the same process, you just put it on a sweatshirt!
Who can resist a polar bear???? There are a ton of fantastic polar bear and Arctic inspired crafts on on the Norm of the North Pinterest Board.
Want a chance to win a $500 gift card or one of 5 Norm of the North Swag Bags in the #NormoftheNorthSweeps...visit the rules and upload your creation to Instagram
Subscribe to:
Posts (Atom)


